Introduction to Maple Bars
Why Maple Bars are the Perfect Homemade Treat
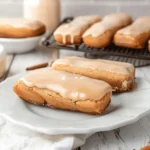
When it comes to delightful homemade desserts, Maple Bars hold a special place in my heart. These deliciously sweet, maple-flavored pastries are not just a treat; they’re an experience. The combination of a light, doughy base topped with a luscious maple glaze offers a perfect balance of flavor and texture. Each bite feels like a cozy hug, making them ideal for any occasion—from casual weekend brunches to festive holiday gatherings.
One of the best aspects of making Maple Bars is that they bring the nostalgia of childhood back into our busy adult lives. Remember those lazy Saturday mornings when the smell of freshly baked goods wafted through the house? Making Maple Bars can recreate that feeling and add a bit of warmth to your kitchen—and your heart!
In addition to their incredible taste, these bars are also incredibly versatile. You can easily customize them by adding nuts, sprinkles, or even integrating flavors like orange zest. This flexibility means you can cater to various dietary preferences and create something unique each time you bake.
Moreover, making Maple Bars at home is not just rewarding but cost-effective. Buying a box of gourmet pastries from local bakeries can add up quickly, sometimes reaching an average of $30 for a dozen. By following a simple recipe, you can whip up a batch for a fraction of that cost, allowing you to impress friends and family without breaking the bank.
If you’re curious about the nutritional aspects, did you know that maple syrup is rich in antioxidants and minerals? Healthline discusses how choosing maple syrup over refined sugars can provide additional vitamins and minerals, making your sweet treat a tad healthier—though moderation is still key!
So, whether you’re a baking novice or a seasoned pro, Maple Bars are a fantastic addition to your culinary repertoire. Are you ready to roll up your sleeves and bring a taste of nostalgia back into your life? Let’s dive into the recipe!
Ingredients for Maple Bars
When you’re craving a scrumptious treat, nothing beats the classic maple bar. Here’s a quick rundown of what you’ll need to whip up this delightful dessert.
Essential ingredients for a classic maple bar
To make authentic maple bars, gather these essential ingredients:
- All-purpose flour: The base for your dough.
- Granulated sugar: For sweetness.
- Unsalted butter: Adds richness and flavor.
- Active dry yeast: Ensures your bars are perfectly fluffy.
- Milk: Helps create a tender texture.
- Eggs: Adds moisture and richness.
- Maple syrup: The star flavor that brings everything together.
- Vanilla extract: Enhances the overall taste.
Optional ingredients for enhanced flavor
Once you have the essentials down, consider these optional ingredients to elevate your maple bars:
- Cinnamon: A dash can bring warmth to the flavors.
- Nutmeg: Adds a subtle spice that complements the maple perfectly.
- Turkey bacon bits: For those who enjoy a sweet and savory twist.
- Chocolate chips: Because who wouldn’t want a chocolaty surprise?
Don’t forget, personalizing your recipe can make them truly unique and delicious. For tips on how to select high-quality maple syrup, check out resources from The Maple Farmers Association. Happy baking!
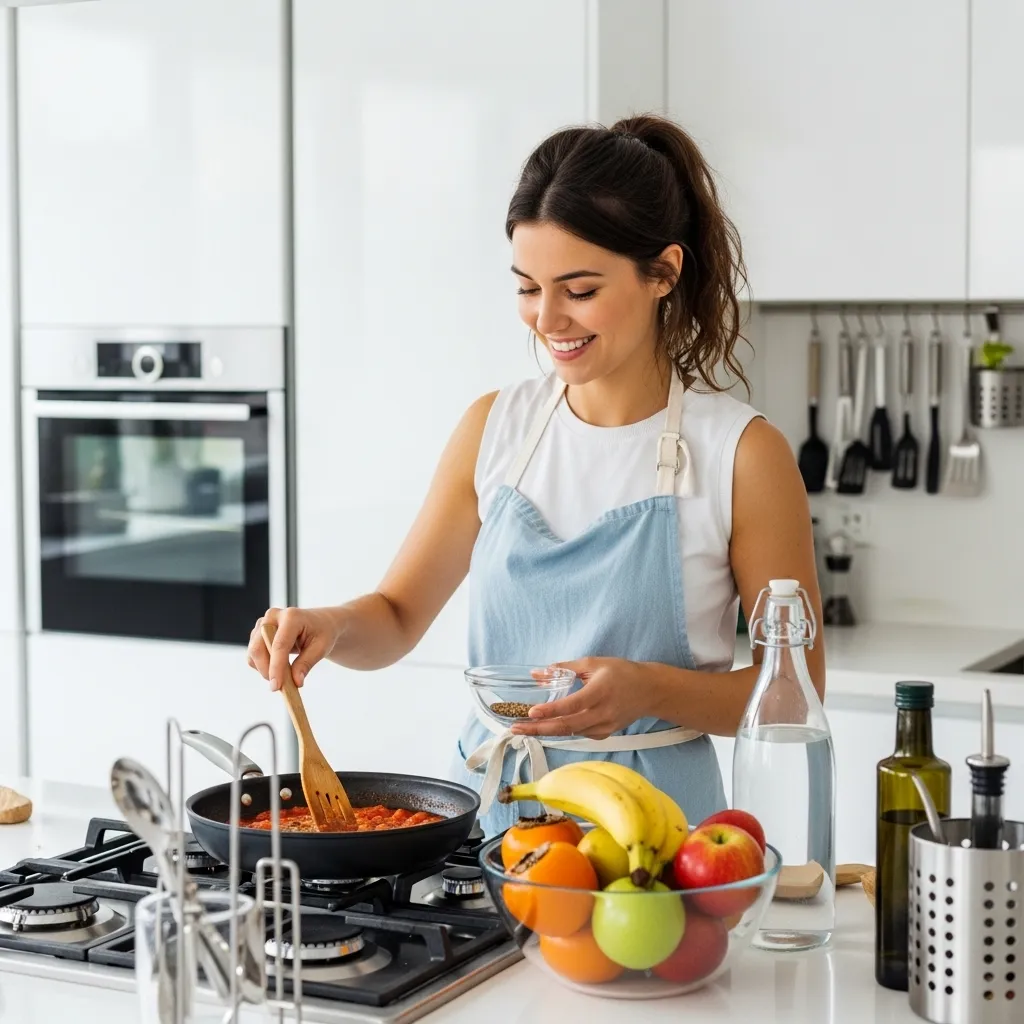
Preparing Maple Bars
Making delicious homemade maple bars is a rewarding experience that fills your kitchen with the warmth of nostalgic flavors. Whether you’re enjoying them with a cup of coffee or sharing them at a gathering, these treats are sure to impress. Let’s walk through the process together!
Gather your ingredients
Before diving in, let’s ensure you have everything you need:
- 2 ¾ cups all-purpose flour
- 1 tablespoon baking powder
- ½ teaspoon salt
- ½ cup unsalted butter, softened
- 1 cup granulated sugar
- 2 large eggs
- 1 tablespoon vanilla extract
- ½ cup whole milk
- ½ cup pure maple syrup
For the frosting, grab:
- 2 cups powdered sugar
- 3 tablespoons maple syrup
- 1 tablespoon milk
- A pinch of salt
Having everything measured out in advance can make this process smoother and infinitely more enjoyable. You might even discover that you get the creativity flowing as you prepare! Be sure to check sources like the USDA FoodData Central for reliable ingredient tips.
Prepare the dough
Start off by whisking together the flour, baking powder, and salt in a mixing bowl. This mixture forms the base of your maple bars and will provide structure. In another bowl, cream together the softened butter and granulated sugar until it’s light and fluffy. This step is crucial; it introduces air into your batter, which translates to a lighter texture when baked!
Next, beat in the eggs one at a time, adding the vanilla extract and maple syrup as well. This combination of wet ingredients will lend both moisture and flavor to your bars. Finally, gradually mix in the dry ingredients, alternating with the milk until everything is just combined. Overmixing can lead to dense bars, so stir gently but thoroughly.
Roll out the dough
With your dough ready, it’s time to roll it out. Lightly flour your work surface to prevent sticking. Using a rolling pin, flatten the dough to about ½ inch thick. This thickness is essential for achieving that perfect soft, chewy interior while still allowing the top to become slightly crisp.
Cut into bar shapes
Now comes the fun part! Use a sharp knife or a dough cutter to slice the rolled-out dough into rectangles. Aim for uniform pieces so they bake evenly. You might like to create traditional bar shapes, or get creative with other forms!
Bake the maple bars to perfection
Preheat your oven to 350°F (175°C). Place the cut bars on a parchment-lined baking sheet, ensuring they have a small amount of space between them for even baking. Bake in the preheated oven for about 15-20 minutes, or until they begin to turn a lovely golden brown. You can use a toothpick to check for doneness: if it comes out clean, they are ready to cool!
Prepare the maple frosting
While the bars cool, it’s time to whip up your maple frosting. In a mixing bowl, combine the powdered sugar, maple syrup, milk, and salt. Whisk until smooth and pourable. This frosting is what transforms your bars from good to exceptional, adding that signature maple flavor we all crave.
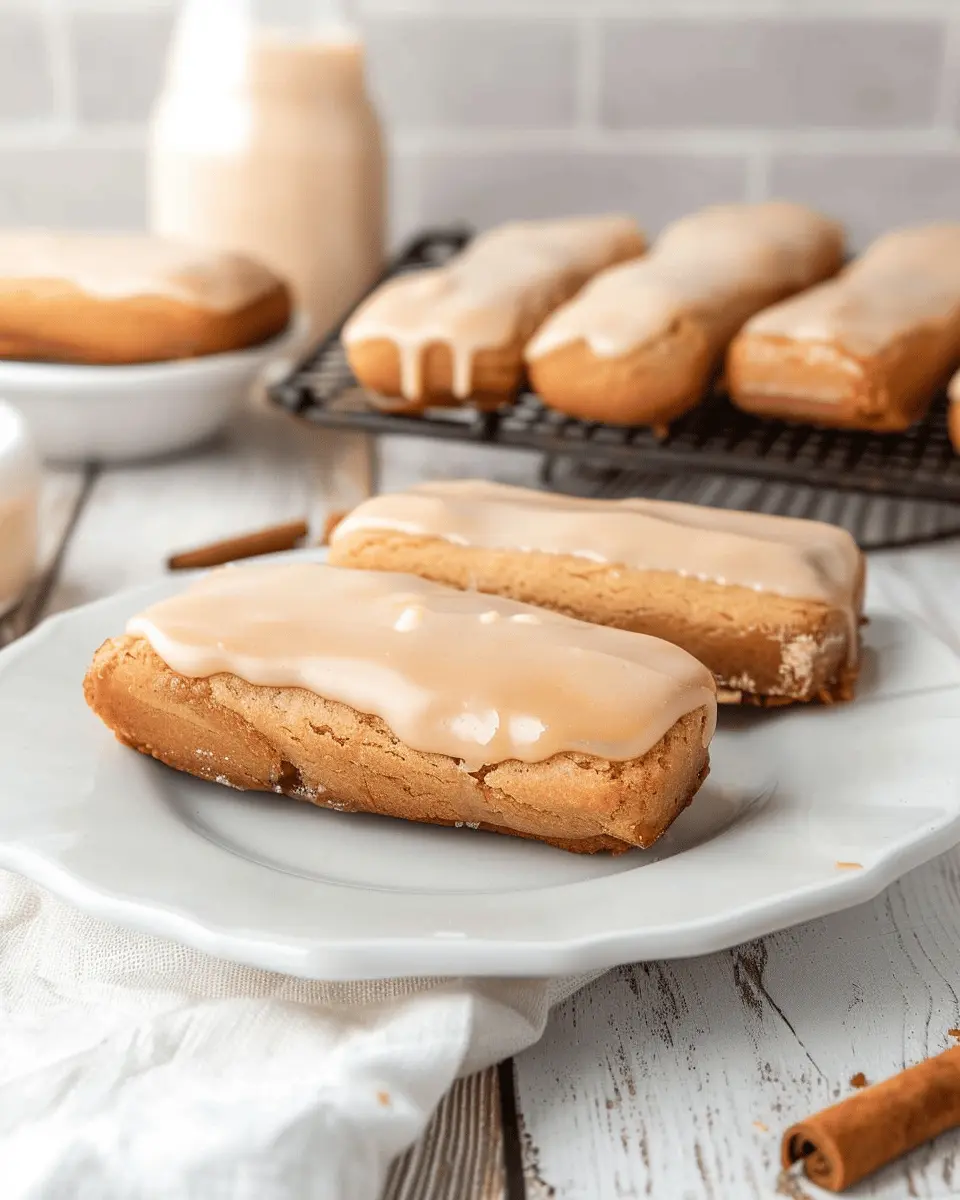
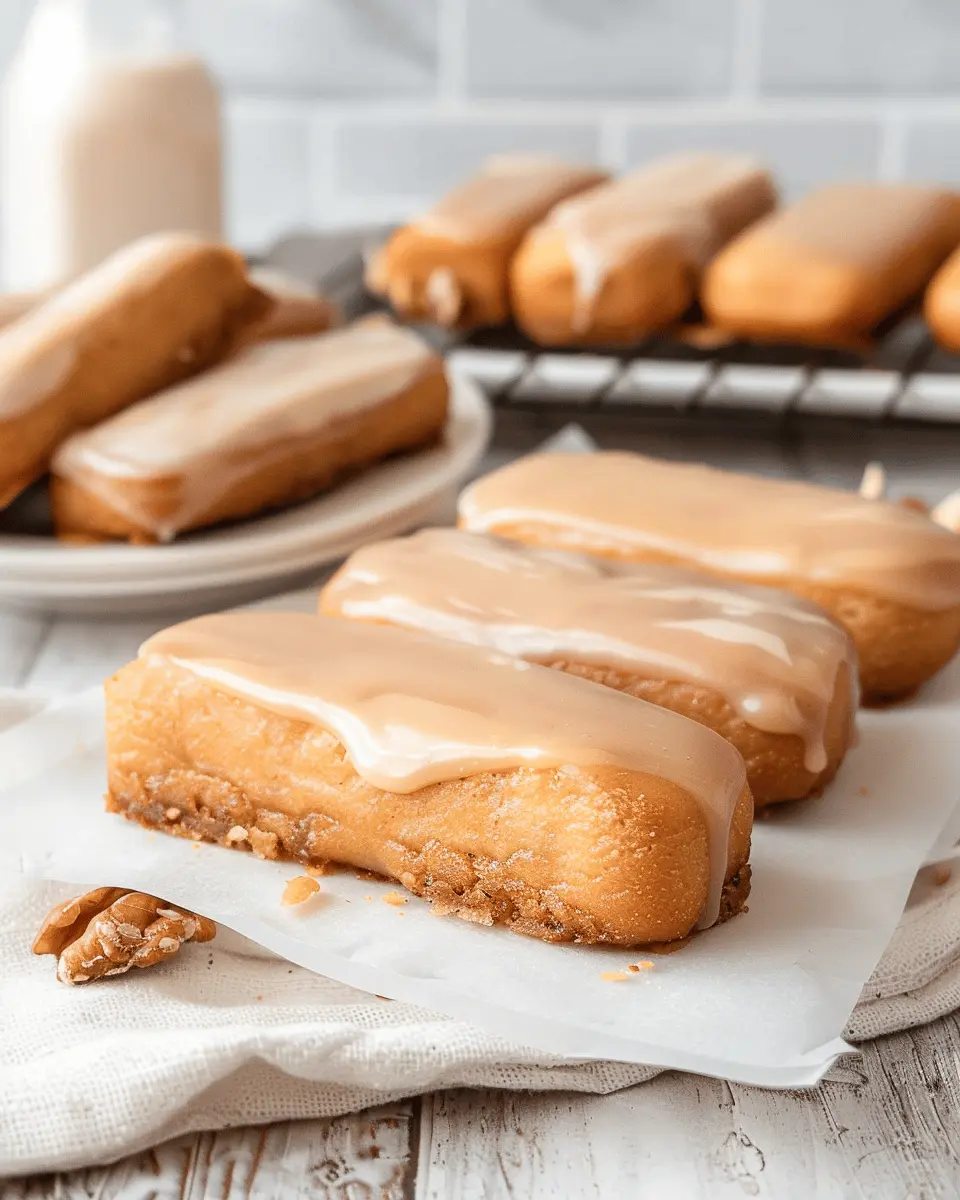
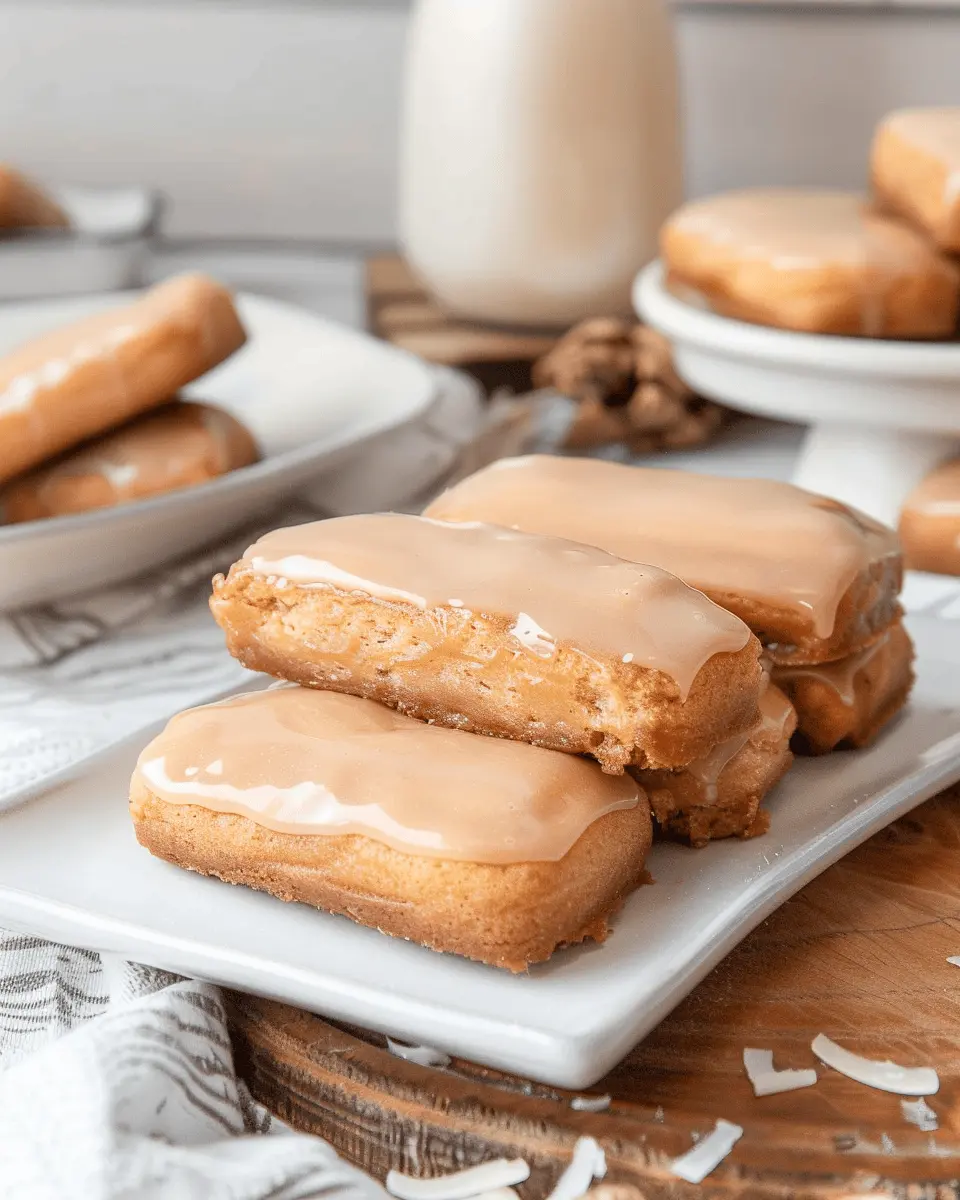
Frost the bars once cooled
Once the bars have cooled completely, generously spread the maple frosting over the top. You can use a spatula or a knife to make this step easier. Feel free to sprinkle on some additional chopped nuts or flaky sea salt for added texture and flavor!
Looking for a smooth frosting? Consider checking out tips from baking experts like Sally’s Baking Addiction for more frosting ideas.
Enjoy your homemade maple bars as a sweet ending to any day! The love and care put into these treats make a world of difference—and I promise they’ll become a favorite in your baking repertoire.
Variations on Maple Bars
Maple Bars with Nuts
If you’re looking to add a comforting crunch to your delicious maple bars, consider sprinkling some chopped nuts on top. Pecans or walnuts work beautifully, offering both texture and a rich, buttery flavor that complements the sweetness of the maple glaze. Just toast them lightly before topping your bars to enhance their flavor. Not only do they make your maple bars more visually appealing, but they also pack a protein punch!
Gluten-Free Maple Bars
For those with gluten sensitivities, don’t worry! You can absolutely make scrumptious gluten-free maple bars. Substitute all-purpose flour with almond flour or a gluten-free blend. The result is soft, tender bars that everyone can enjoy, regardless of dietary restrictions. You might want to check out Naturally Sweet Gluten-Free for some great tips and recipes that can be modified for delicious gluten-free baking.
Maple Bars with Chocolate Drizzle
Who says maple bars can’t get even better? A drizzle of melted dark or milk chocolate adds a new layer of indulgence that takes your maple bars to the next level. Simply melt your choice of chocolate and use a fork to create artistic swirls on top of the glazed bars. The combination of the rich chocolate with the sweet maple flavor is truly irresistible. It’s a perfect idea for special occasions or just when you need a little extra sweetness in your life.
By exploring these variations, you can enjoy a fun twist on a classic treat. Whether you’re sharing them with friends or savoring them solo, maple bars can cater to every palate!
Cooking Tips and Notes for Maple Bars
Common Mistakes to Avoid
When making Maple Bars, it’s easy to stumble into some common pitfalls. Here are a few to watch out for:
- Overmixing the Dough: Too much mixing can lead to dense bars. Mix until just combined for a lighter texture.
- Inaccurate Measurements: Baking is a science! Use a kitchen scale for precision, especially when it comes to flour and sugar.
- Skipping the Cooling Time: Patience is vital. Let your bars cool completely before adding the glaze to ensure it sticks properly rather than sliding off.
How to Make Your Bars Extra Fluffy
Want your Maple Bars to have that perfect fluffiness? Here are some secret tips:
- Use Fresh Ingredients: Check that your baking powder is active, as fresh ingredients contribute greatly to the fluffiness of baked goods.
- Separate Your Eggs: For an even fluffier texture, consider separating the eggs. Beat the egg whites until they’re stiff, then fold them carefully back into the batter.
- Incorporate Buttermilk: Using buttermilk instead of regular milk adds moisture and a lovely tang that can enhance the overall flavor and texture.
Experiment with these tips the next time you whip up a batch and watch your Maple Bars transform! For more insights on baking techniques, check out resources like King Arthur Baking or Serious Eats.

Serving Suggestions for Maple Bars
Perfect pairings for coffee or tea
If you’re diving into a delicious Maple Bar, you might wonder what to sip alongside this sweet treat. A cup of freshly brewed coffee enhances the warm, rich flavors of maple, creating a delightful balance—plus, it adds that much-needed caffeine kick for your busy day. For a lighter option, consider a soothing herbal tea, like chamomile or ginger, which can complement the sweetness beautifully. According to a study from the Institute of Food Technologists, pairing sweets with coffee can actually enhance flavor perception. Why not brew a pot and enjoy?
Creative ways to present maple bars
Presentation goes a long way when it comes to entertaining or simply indulging yourself. Think about arranging your Maple Bars on a rustic wooden platter or a vibrant colored dish to make those golden hues pop. Sprinkle some chopped nuts or a dusting of powdered sugar over them for an extra touch. You could even stack a few on a tiered cake stand—an easy yet impressive way to elevate your snack game! If you’re feeling generous, consider wrapping them in parchment paper and tying them with twine for a charming gift to friends or neighbors.
For more inspiration on food pairings, check out this guide to coffee and dessert pairings that may give you fresh ideas!
Time breakdown for Maple Bars
Preparation time
Making Maple Bars starts with about 15 minutes of preparation. You’ll need to gather your ingredients—think flour, sugar, baking powder, and of course, maple syrup. You might enjoy this part; it’s like setting up for a mini-art project in the kitchen!
Baking time
Once everything is mixed and ready, it’s time to pop your bars in the oven. Expect about 25-30 minutes of baking time. You’ll want that lovely golden-brown color to appear, which is a sure sign of deliciousness.
Cooling time
Patience pays off during the cooling phase! Allow your Maple Bars to cool for about 20-30 minutes. This step is crucial as it helps the bars firm up, ensuring each slice holds its shape beautifully.
Total time
In total, you’re looking at roughly 1 to 1.5 hours from start to finish. Not too shabby, right? In no time, you’ll have a delightful batch of Maple Bars ready to share (or keep all to yourself). For more tips on baking times, check out this helpful guide from the American Bakers Association.
Feel free to play around with flavors or toppings once you’ve mastered the basic recipe. The key is having fun in the kitchen!
Nutritional facts for Maple Bars
Calories per serving
If you’re wondering about the calorie content, a typical serving of homemade Maple Bars packs around 250 calories. This makes them a delightful treat that’s rich in flavor without completely derailing your daily intake. Just remember, moderation is key to enjoying these treats!
Sugar content
One of the standout features of Maple Bars is their sweetness. On average, each serving contains about 18 grams of sugar. While that may seem high, it’s good to keep in mind that maple syrup brings not only sweetness but also minerals—so you’re experiencing more than just sugar!
Key nutrients
These delicious bars offer some nutritional benefits, thanks to their main ingredient, maple syrup. You can expect:
- Manganese: An essential mineral that supports metabolism.
- Zinc: Important for immune function.
- Antioxidants: A natural source that aids in overall health.
For more insights into the nutritional value of maple syrup, consider checking out this detailed study from the U.S. Department of Agriculture. Enjoy your Maple Bars guilt-free, knowing they have more than just sugar to offer!
FAQs about Maple Bars
Can I use maple syrup substitutes?
Absolutely! If you find yourself short on real maple syrup, there are some tasty alternatives you can consider for your Maple Bars. Sweeteners like agave syrup, honey, or even a mix of brown sugar and water can work in a pinch. However, do remember that these substitutes might alter the flavor profile and texture slightly, so pick one that you enjoy!
How long do maple bars last?
Once you’ve made your Maple Bars, you’ll want to enjoy them fresh for the best taste. Generally, home-baked maple bars will last about 2 to 3 days at room temperature if stored in an airtight container. If you’re keeping them in the fridge, they can hold up to a week, but be aware that refrigeration might make them a bit denser. For those who love their treats fresher, consider checking out expert advice from The Kitchn on storing sweet treats.
Can I freeze maple bars?
You sure can! Freezing your Maple Bars is a great way to enjoy them later. Simply wrap each bar in plastic wrap and then store them in a freezer-safe container or bag. They can last for up to 2-3 months in the freezer. When you’re ready to enjoy them, let them thaw in the fridge or at room temperature for optimal taste. For tips on how to properly freeze baked goods, check out Food Network.
With these FAQs, you’re all set to enjoy making and sharing these delightful Maple Bars! Do you have any other questions? Feel free to ask!
Conclusion on Maple Bars
Final thoughts on why you should make maple bars at home
Crafting your own maple bars at home not only satisfies your sweet tooth but also offers a delightful baking experience. There’s something deeply satisfying about taking simple ingredients like flour, sugar, and of course, maple syrup, turning them into delicious treats. The aroma wafting through your kitchen while they bake is irresistible!
By making maple bars from scratch, you can customize toppings and fillings to match your taste preferences. Plus, sharing these homemade delights with friends can elevate any gathering! For more inspiration, check out this article on baking tips at King Arthur Flour. So, why not embrace your inner baker and whip up a batch? You won’t regret it!
PrintMaple Bars: Easy Indulgence for Your Homemade Desserts
Indulge in the sweet, rich flavors of maple bars, perfect for your next dessert craving.
- Prep Time: 15 minutes
- Cook Time: 30 minutes
- Total Time: 45 minutes
- Yield: 12 servings 1x
- Category: Desserts
- Method: Baking
- Cuisine: American
- Diet: Vegetarian
Ingredients
- 2 cups all-purpose flour
- 1 cup maple syrup
- 1/2 cup unsalted butter
- 1 cup brown sugar
- 2 eggs
- 1 teaspoon baking powder
- 1/2 teaspoon salt
Instructions
- Preheat your oven to 350°F (175°C).
- In a mixing bowl, combine flour, baking powder, and salt.
- In another bowl, cream together butter and brown sugar.
- Add eggs and maple syrup to the butter mixture, and mix well.
- Gradually add the dry ingredients to the wet mixture until well combined.
- Pour the batter into a greased baking pan.
- Bake for 25-30 minutes or until a toothpick comes out clean.
- Allow to cool before slicing and serving.
Notes
- For an extra kick, add some chopped nuts or chocolate chips to the batter.
Nutrition
- Serving Size: 1 bar
- Calories: 220
- Sugar: 18g
- Sodium: 150mg
- Fat: 9g
- Saturated Fat: 5g
- Unsaturated Fat: 3g
- Trans Fat: 0g
- Carbohydrates: 34g
- Fiber: 1g
- Protein: 3g
- Cholesterol: 50mg
Keywords: Maple Bars, dessert, homemade, easy recipe