Introduction to Mummy Oreo Truffles
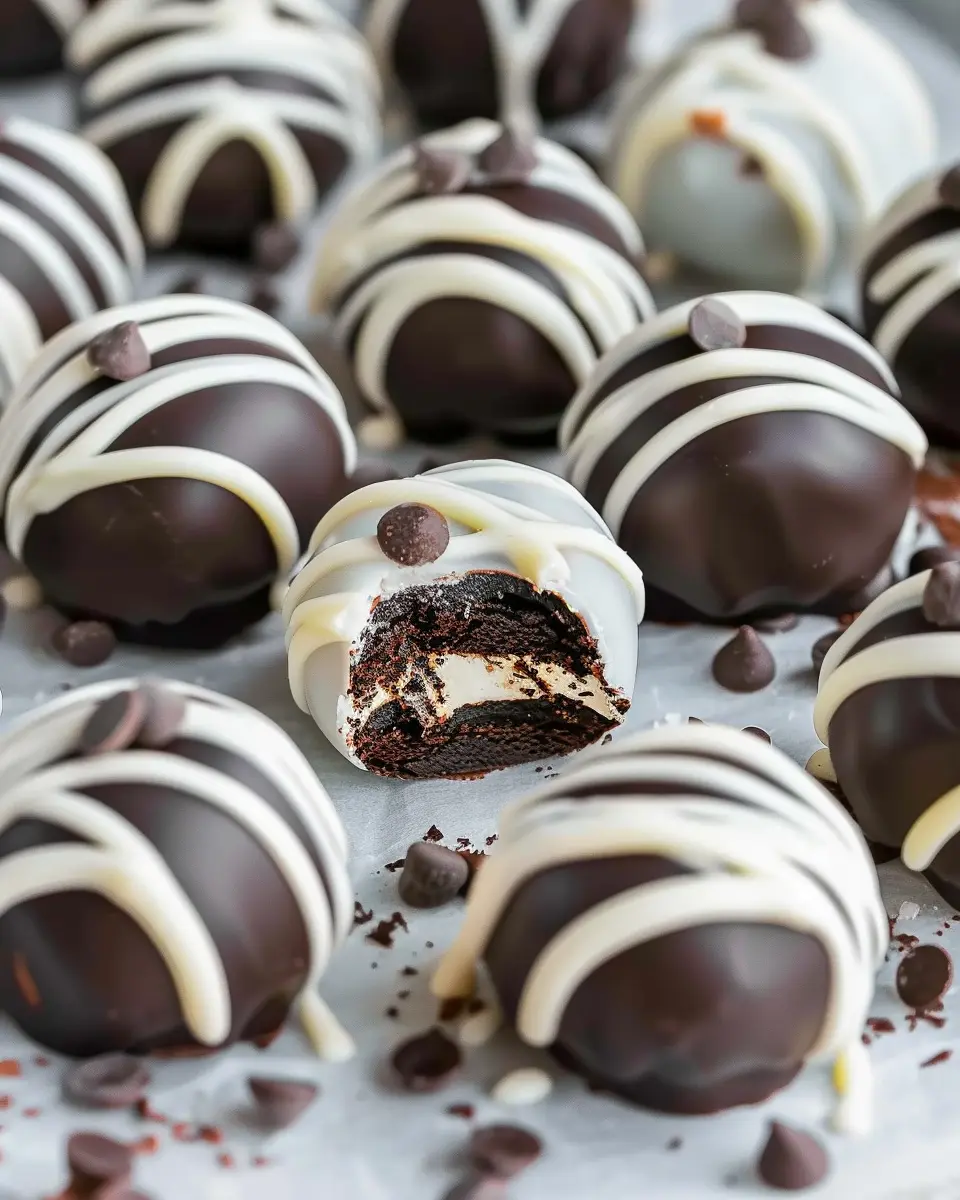
When it comes to festive treats that spark joy and creativity, Mummy Oreo Truffles reign supreme. These delightful bite-sized snacks are not only delicious but also visually charming, making them the perfect sweet addition to your Halloween celebrations or any spooky gathering.
Why Mummy Oreo Truffles are the perfect fun treat?
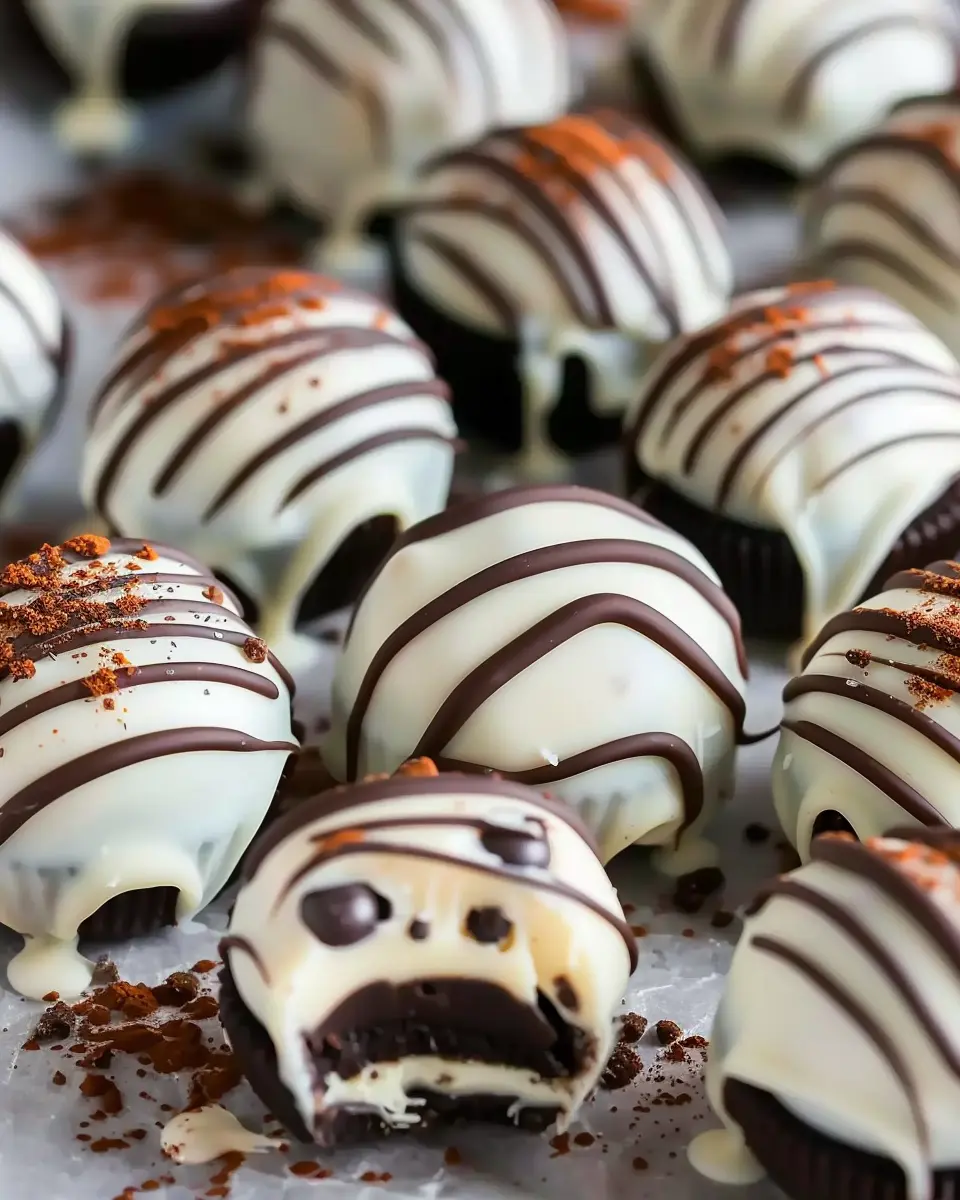
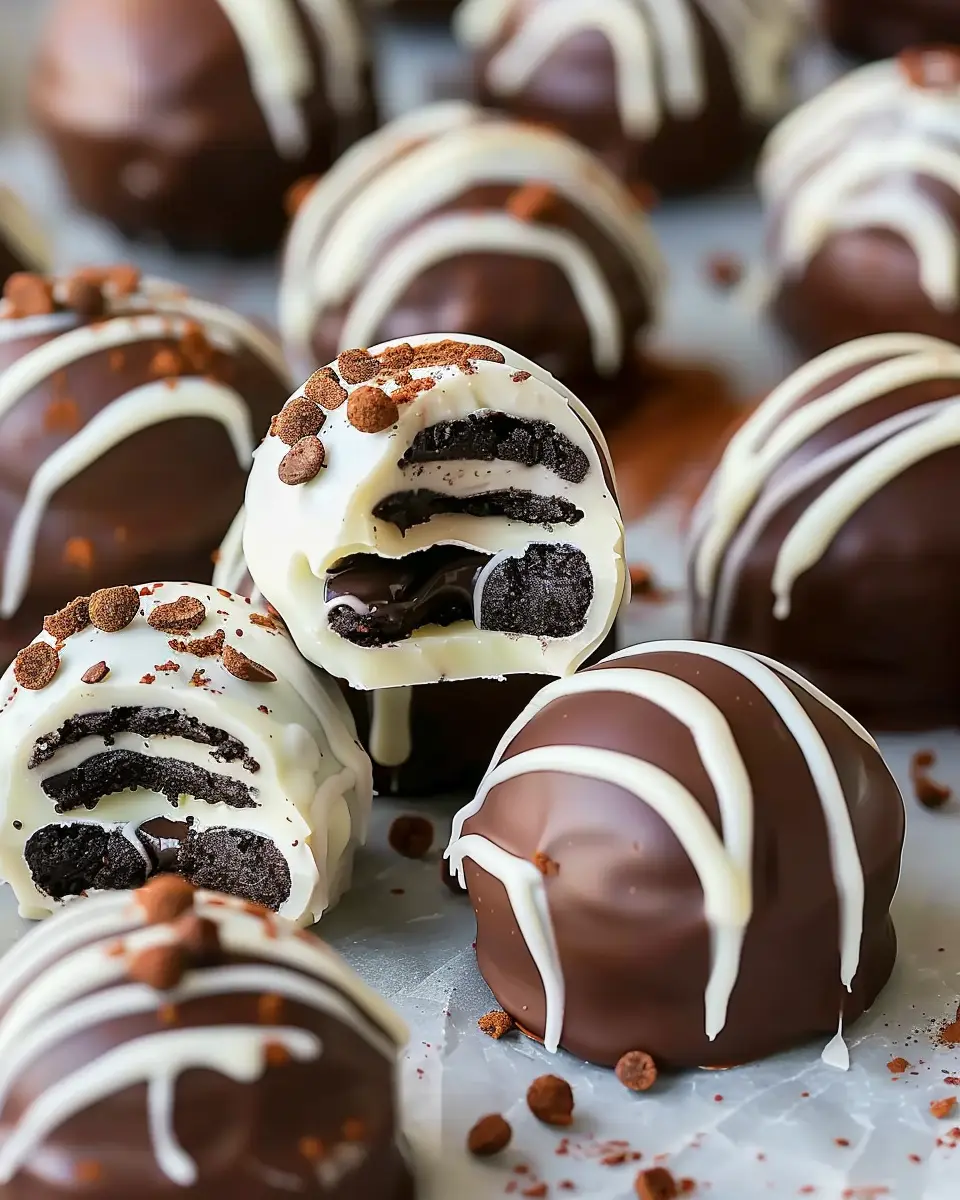
Imagine a creamy, dreamy filling encased in a crunchy Oreo cookie, all wrapped up in a sweet white chocolate coating. That’s exactly what Mummy Oreo Truffles deliver! They’re simple to whip up, requiring just a handful of ingredients and minimal time in the kitchen. It’s a fantastic way to bond with friends or family – think of them as an interactive cooking project where you can unleash your artistic side by decorating each truffle like a mummy.
But what really makes these truffles stand out? They strike the perfect balance between indulgence and fun. Kids and adults alike love the familiar taste of Oreos, and the playful mummy look adds an element of excitement. According to nutritionists, indulging in treats like these in moderation can actually bring a boost to our mental well-being. Just think about how much joy can come from a simple sweet!
Creating Mummy Oreo Truffles is also a wonderful opportunity to explore your decorating skills. Use melted chocolate to create cute mummy eyes with mini chocolate chips, or get creative with edible googly eyes! This is an excellent way to stay engaged, especially when hosting a gathering or a casual get-together. Plus, they make for an Instagram-worthy treat that will undoubtedly impress your friends.
Looking for ways to enjoy truffles beyond Halloween? These delightful snacks can be customized with your favorite flavors year-round. Have fun with different chocolate types or add festive sprinkles to match any occasion.
Want to delve deeper into the world of creative snacks? Be sure to explore the art of making chocolate-covered strawberries or learn about the benefits of including a variety of sweets in your diet for special events. Those interested in more festive ideas can check out this resource for seasonal inspiration.
So, why wait? Let’s dive into making these delectable Mummy Oreo Truffles and celebrate the joy they bring!
Ingredients for Mummy Oreo Truffles
Creating delightful Mummy Oreo Truffles is easier than you think! Let’s dive into the essential ingredients that will make your treats both scrumptious and spooky.
Essential Ingredients for the Truffles
To whip up these delicious Mummy Oreo Truffles, you’ll need:
- Oreo Cookies: The star of the show! These provide the rich, chocolatey base.
- Cream Cheese: This binds the crushed Oreos and adds a creamy texture.
- White Chocolate: Essential for coating your truffles, giving them that deliciously sweet finish.
- Mini Chocolate Chips: Perfect for those cute little eyes that bring your mummies to life!
Optional Ingredients to Enhance Flavors
Want to take your Mummy Oreo Truffles to the next level? Here are some optional enhancements:
- Flavor Extracts: A few drops of vanilla or mint extract can elevate the flavor profile.
- Sprinkles: Edible glitter or Halloween-themed sprinkles can add a festive touch.
- Drizzling Chocolate: Use different types of melted chocolate for a decorative touch.
Feel free to experiment, and remember, cooking is all about having fun! If you’re looking for more inspiration, you might enjoy checking out Food Network for additional tips. Happy cooking!
Step-by-Step Preparation of Mummy Oreo Truffles
Creating Mummy Oreo Truffles is a delightful and easy way to bring some fun into any gathering, especially during the Halloween season. Let’s dive into the step-by-step process that will lead you to these creamy, chocolatey treats that are bound to impress your friends.
Crush the Oreos
First things first, grab a package of your favorite classic Oreo cookies. You’ll want to make sure they’re not the double stuff for this recipe. Ideally, you should use approximately 24 Oreos. To crush them:
- Option 1: Place the Oreos in a zip-top bag, seal it tightly, and use a rolling pin or a heavy object to break them down into fine crumbs.
- Option 2: Use a food processor. Just pulse until you have a finely ground mixture, which should take about 30 seconds.
Whichever method you choose, the goal is the same: you need those Oreos to become a smooth, crumbly texture. Tip: Not only will the crumbs make the truffles delicious, but they will also give them that classic Oreo flavor that everyone knows and loves!
Combine Oreo Crumbs with Cream Cheese
Now it’s time to introduce a key player in our Mummy Oreo Truffles: cream cheese. This rich and creamy element helps bind everything together while adding a velvety texture. In a mixing bowl, combine your crushed Oreos with 8 oz of softened cream cheese.
- Use a spatula to mix thoroughly, or for a more hands-on approach, use your hands to knead the mixture until it’s well blended.
- The end result should be a sticky, moldable dough that holds together when pressed.
Did you know that cream cheese has its origins via ancient civilizations like the Romans? Recreating this classic flavor in a truffle keeps history alive in a fun, edible form!
Roll into Balls and Chill
Once your mixture is well-combined, it’s time to create the shape of your truffles. Use a small cookie scoop or your hands to form bite-sized balls, approximately 1 inch in diameter. You should end up with about 20-24 truffles.
- After forming the balls, place them on a baking sheet covered with parchment paper.
- Now, it’s critical to chill these truffles in the fridge for at least 30 minutes. Chilling helps them firm up, making the next steps much easier.
While your truffles chill, consider pairing them with a warm cup of tea or coffee — the contrasting temperatures are divine!
Melt Chocolate for Coating
As the truffles chill, prepare for the flavorful coating! For this, you’ll need about 1-2 cups of white chocolate chips or candy melts.
- In a microwave-safe bowl, melt your chocolate in 30-second intervals, stirring between each, until it’s smooth and fully melted. This method prevents overheating and ensures a lovely fluid texture for dipping.
- If you’d like, you can add a tablespoon of coconut oil, which helps achieve a smooth consistency.
This is your moment to channel your inner chocolatier!
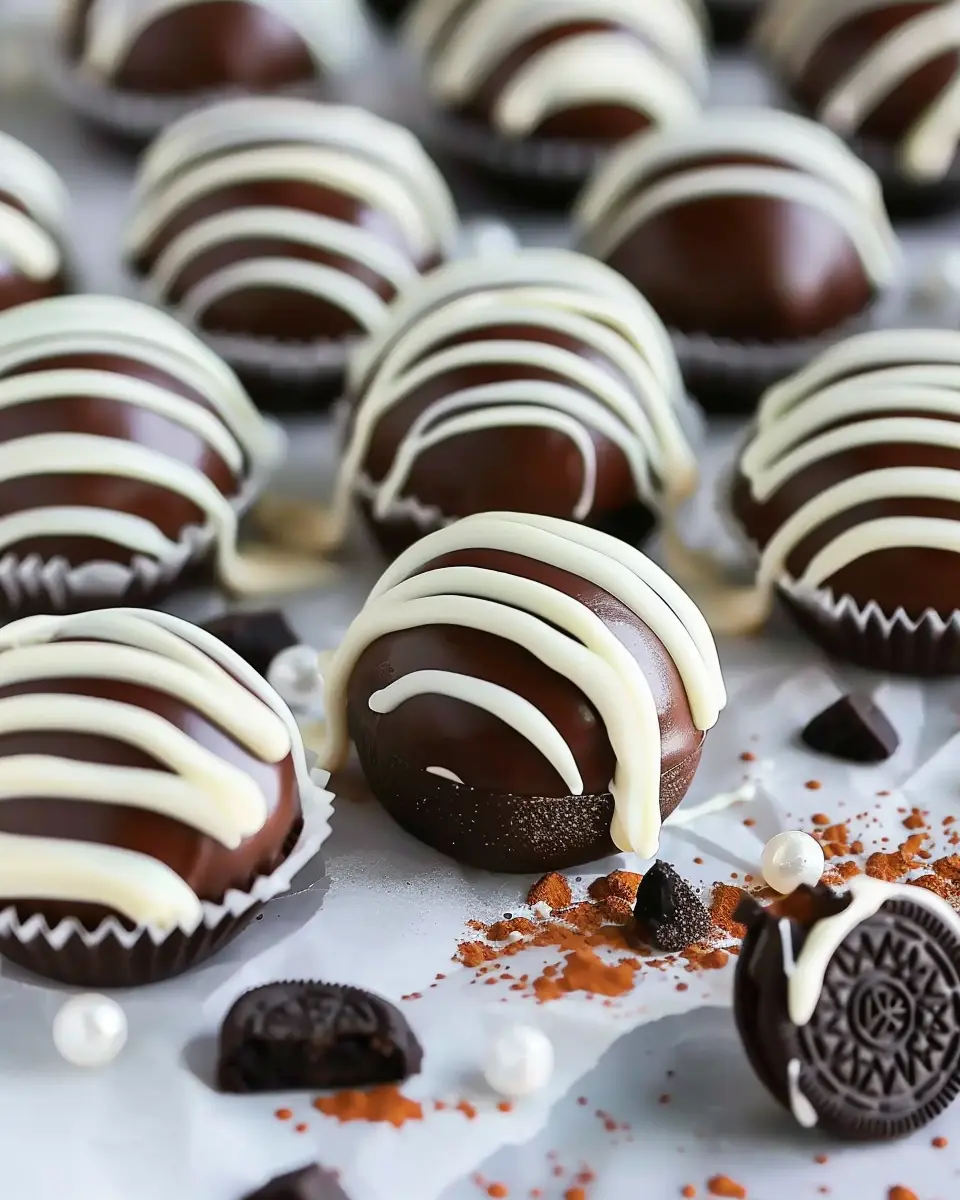
Dip the Truffles and Create the Mummy Look
Now the fun begins! Remove the truffles from the fridge and, using a fork, gently dip each one into the melted chocolate, allowing the excess to drip off before placing them back on the parchment paper.
- Once dipped, let the chocolate set slightly before you create that cute mummy look. In a piping bag or a zip-top bag with the corner snipped off, drizzle more melted chocolate over each truffle to mimic mummy bandages.
- Finally, add edible eyes — mini chocolate chips or candy eyeballs work perfectly.
And just like that, your Mummy Oreo Truffles are ready to be the star of the party! The best part? They’re not only adorable but also packed with flavor. Enjoy sharing these delightful treats, and don’t forget to take some photos — your friends will definitely want the recipe!
For more exciting dessert ideas, check out SugarHero and embrace your inner pastry chef!
Variations of Mummy Oreo Truffles
When it comes to making Mummy Oreo Truffles, the variations are nearly endless, allowing you to get creative in the kitchen. Whether you’re hosting a Halloween party or just looking to impress friends with a unique treat, these adaptations are sure to delight.
Mummy Truffles with Different Cookies
While Oreo cookies are classic, feel free to switch things up! Here are a few alternative cookie ideas:
- Chocolate Chip Cookies: For a chewy twist, use crushed chocolate chip cookies. The mixture of textures will add an exciting element.
- Gingersnaps: If you’re seeking a spicier flavor profile, gingersnaps paired with cream cheese create a festive fall treat. The warm spices elevate the overall taste.
- Gluten-Free Cookies: For friends with dietary restrictions, gluten-free cookies work beautifully. Check out brands like Gluten-Free Oreo for a perfect substitution.
Decorate with Alternative Toppings
Your creativity in decorating Mummy Oreo Truffles can truly set them apart. While white chocolate drizzle is a classic, consider these fun options:
- Colored Melting Chocolate: Swap white chocolate for orange or green to add festive flair. This makes them extra eye-catching!
- Candy Eyes: For a fun and quirky touch, stick candy eyes on your truffles before the chocolate hardens.
- Sprinkles: Use various sprinkles to give your truffles a pop of color or a spooky look. Halloween-themed sprinkles are widely available at craft stores.
These variations and decorating ideas ensure that your Mummy Oreo Truffles are not just delicious but also a feast for the eyes. Plus, they allow you to cater to different tastes and preferences, making your spooky snacks even more enjoyable. So, gather your ingredients and embrace the creative potential of these delightful treats!
Cooking Tips and Notes for Mummy Oreo Truffles
Tips for Melting Chocolate Smoothly
When making Mummy Oreo Truffles, achieving a smooth chocolate coating is crucial for that professional touch. Here are some tips:
- Use a Double Boiler: This prevents the chocolate from burning. Just simmer water in your pot and place a heatproof bowl on top.
- Chop Your Chocolate: Cutting it into small, uniform pieces helps it melt more evenly. You can also use high-quality chocolate chips for a consistent melt.
- Be Patient: Stir gently and allow the chocolate to melt slowly. If you’re in a pinch, the microwave works—just heat it in short bursts (15-20 seconds) with frequent stirring to avoid hot spots.
For more chocolate melting tips, check out Serious Eats.
Recommendations for Rolling the Perfect Truffles
Creating perfectly round truffles can be tricky. Here’s how to nail it:
- Chill Your Mixture: After combining the crushed Oreos and cream cheese, refrigerate the mixture for about 30 minutes. This makes it easier to scoop and shape.
- Use a Small Ice Cream Scoop: This ensures uniform size for each truffle, making your Mummy Oreo Truffles look even more appealing.
- Keep Your Hands Moist: Lightly wetting your hands can help prevent sticking while rolling the truffles into smooth balls.
Have fun creating your Mummy Oreo Truffles, and don’t hesitate to get creative with different toppings or flavors!
Serving Suggestions for Mummy Oreo Truffles
Creative Ways to Display Your Truffles
When it comes to showcasing your Mummy Oreo Truffles, presentation is key! Try arranging these delightful little treats on a spooky-themed platter adorned with faux cobwebs or miniature pumpkins for that extra Halloween flair. For an interactive twist, consider using clear treat bags tied with orange or black ribbons, which not only look adorable but also make for easy grab-and-go options. If you’re feeling crafty, place them in small cauldrons for a whimsical touch that will have your guests smiling.
Pairing Ideas for Sharing at Gatherings
Sharing your Mummy Oreo Truffles is all about complementing flavors. Pair them with a strong cup of coffee or a rich hot chocolate to balance their sweetness. If you’re hosting a fall-themed gathering, why not add some spiced apple cider for a comforting pairing that adds seasonal warmth? For a bit of crunch, set out a dish of assorted nuts or popcorn. This contrast of textures makes your dessert table irresistibly inviting!
If you’re looking for more creative dessert ideas, check out Food Network’s dessert section for inspiration!
Time Breakdown for Mummy Oreo Truffles
Preparation time
Creating your Mummy Oreo Truffles is an absolute breeze! You’ll spend around 15 minutes gathering your ingredients and blending those delicious Oreos with cream cheese. Just imagine how fun it is to get your hands a little messy with this treat!
Chilling time
Next up, we’ll give your truffles some well-deserved chill time. Let them rest in the fridge for about 30 minutes. This crucial step settles the mixture, allowing it to firm up and hold its shape when you roll them.
Total time
In total, you’ll be looking at roughly 45 minutes from start to finish. Trust me, this is a small investment for such a delightful treat. Soon, you’ll be rewarding yourself with some tasty Mummy Oreo Truffles!
For a deeper dive into truffle-making tips, check out The Kitchn for more insights.
Nutritional Facts for Mummy Oreo Truffles
When it comes to indulgent treats like Mummy Oreo Truffles, it’s essential to balance enjoyment with nutritional awareness. Each truffle packs a delightful punch, but let’s dive into the specifics.
Calories per truffle
Each Mummy Oreo Truffle contains approximately 120 calories. While they are a sweet indulgence, moderation is key!
Nutritional breakdown
Here’s a sneak peek into the nutritional content per truffle:
- Sugar: 10g
- Total Fat: 7g
- Saturated Fat: 4g
- Carbohydrates: 15g
- Protein: 1g
These truffles feature a blend of rich ingredients, including cream cheese and Oreo cookies, contributing to their unique flavor. While these numbers seem delightful, you might want to enjoy them as an occasional treat rather than a daily staple. If you’re looking for healthier alternatives, consider incorporating ingredients like Greek yogurt or nut butters for a boost in protein and flavor.
Curious about balancing indulgence with nutrition? Check out resources from Healthline for tips on treating yourself while maintaining a healthy lifestyle.
FAQs about Mummy Oreo Truffles
Can I use gluten-free Oreos in this recipe?
Absolutely! You can use gluten-free Oreo cookies to make your Mummy Oreo Truffles just as delicious while accommodating gluten-sensitive eaters. Look for brands like Gluten-Free Oreo or similar products. The creaminess and flavor will not be compromised, and everyone can join in on the fun.
What’s the best way to store leftover truffles?
After you’ve whipped up your Mummy Oreo Truffles, you might not finish them in one sitting (although, let’s be honest, it can be hard to resist!). To keep them fresh, simply store them in an airtight container in the refrigerator. They should stay good for about a week. For longer storage, you can freeze them! Just ensure they’re well-wrapped to avoid freezer burn. Thaw them in the fridge before indulging again.
Can I customize the flavor of the truffles?
Definitely! One of the best things about Mummy Oreo Truffles is their versatility. While the classic Oreo combination is delightful, you can switch up the flavors too. Consider mixing in your favorite chips, like peanut butter or mint. Or, instead of white chocolate for the coating, you could try using dark or milk chocolate. The sky’s the limit!
These little bites of joy are all about personalization. So, get creative! For some inspiration, check out Baker’s Royale, where flavor combinations are endless!
Feel free to experiment and find what brings a smile to your face—truly, there’s no wrong way to enjoy these truffles!
Conclusion on Mummy Oreo Truffles
Making your own Mummy Oreo Truffles at home is an enjoyable and rewarding experience, perfect for impressing friends at gatherings or satisfying a sweet tooth. Not only are these truffles delightfully simple to prepare, but they also allow for customization; you can adjust the sweetness or even try different toppings to suit your taste.
Beyond the indulgence, creating treats like these can foster creativity in the kitchen. Plus, sharing these festive snacks can make any occasion more special. So gather your ingredients, roll up those sleeves, and enjoy the fun of crafting these delightful truffles with loved ones! For more inspiration, check out Epicurious for seasonal dessert ideas.
PrintMummy Oreo Truffles: The Easy Indulgence for Halloween Treats

These Mummy Oreo Truffles are the perfect Halloween treat that combines the rich taste of Oreo cookies with a fun mummy design. Easy to make and even easier to indulge in!
- Prep Time: 20 minutes
- Cook Time: 0 minutes
- Total Time: 50 minutes
- Yield: 24 truffles 1x
- Category: Dessert
- Method: No Bake
- Cuisine: American
- Diet: Vegetarian
Ingredients
- 1 package Oreo cookies
- 8 oz cream cheese
- 1 cup white chocolate chips
- 2 tablespoons black decorating icing
Instructions
- Crush the Oreo cookies in a food processor until fine crumbs form.
- In a bowl, mix the crushed Oreo cookies with cream cheese until well combined.
- Form the mixture into small balls and place them on a baking sheet.
- Chill the balls in the refrigerator for 30 minutes.
- Melt the white chocolate chips in a microwave-safe bowl.
- Dunk each ball into the melted chocolate, coating completely.
- Remove and place back on the baking sheet to set.
- Once set, use the black icing to add mummy eyes and bandages.
Notes
- For best results, use room temperature cream cheese to make mixing easier.
Nutrition
- Serving Size: 1 truffle
- Calories: 150
- Sugar: 10g
- Sodium: 50mg
- Fat: 8g
- Saturated Fat: 4g
- Unsaturated Fat: 2g
- Trans Fat: 0g
- Carbohydrates: 17g
- Fiber: 1g
- Protein: 1g
- Cholesterol: 10mg
Keywords: Mummy Oreo Truffles, Halloween Treats, Dessert