
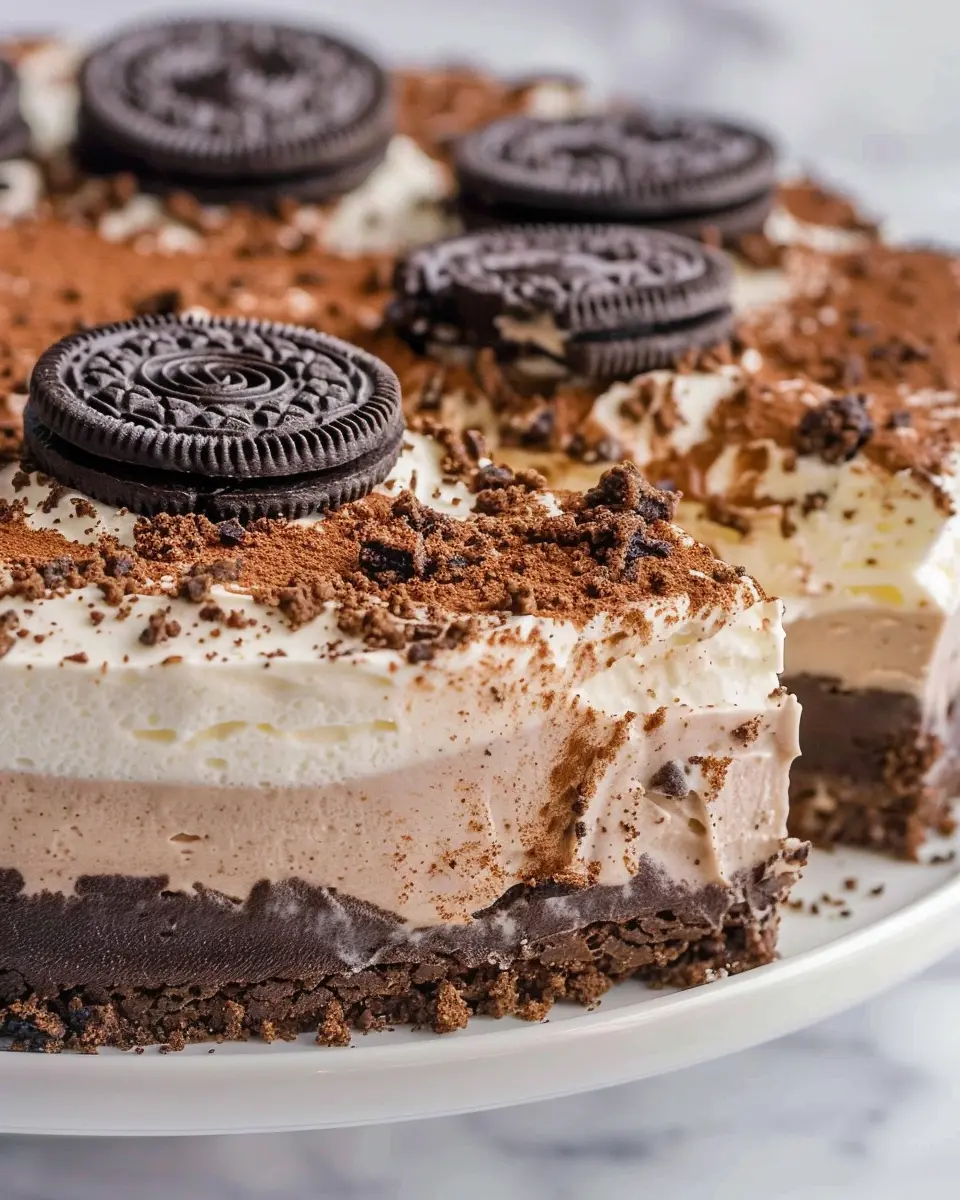
Introduction to Oreo Mousse Cake
When you think of the perfect dessert for busy young professionals, the Oreo Mousse Cake often springs to mind. Why is this sweet treat so beloved? Well, it combines the nostalgic flavor of classic Oreos with a light, airy mousse that makes it an indulgence without the heaviness of typical cakes. It’s also incredibly easy to whip up, which is a huge plus for anyone juggling work, social commitments, and the occasional Netflix binge.
Why Oreo Mousse Cake is the ultimate dessert for young professionals?
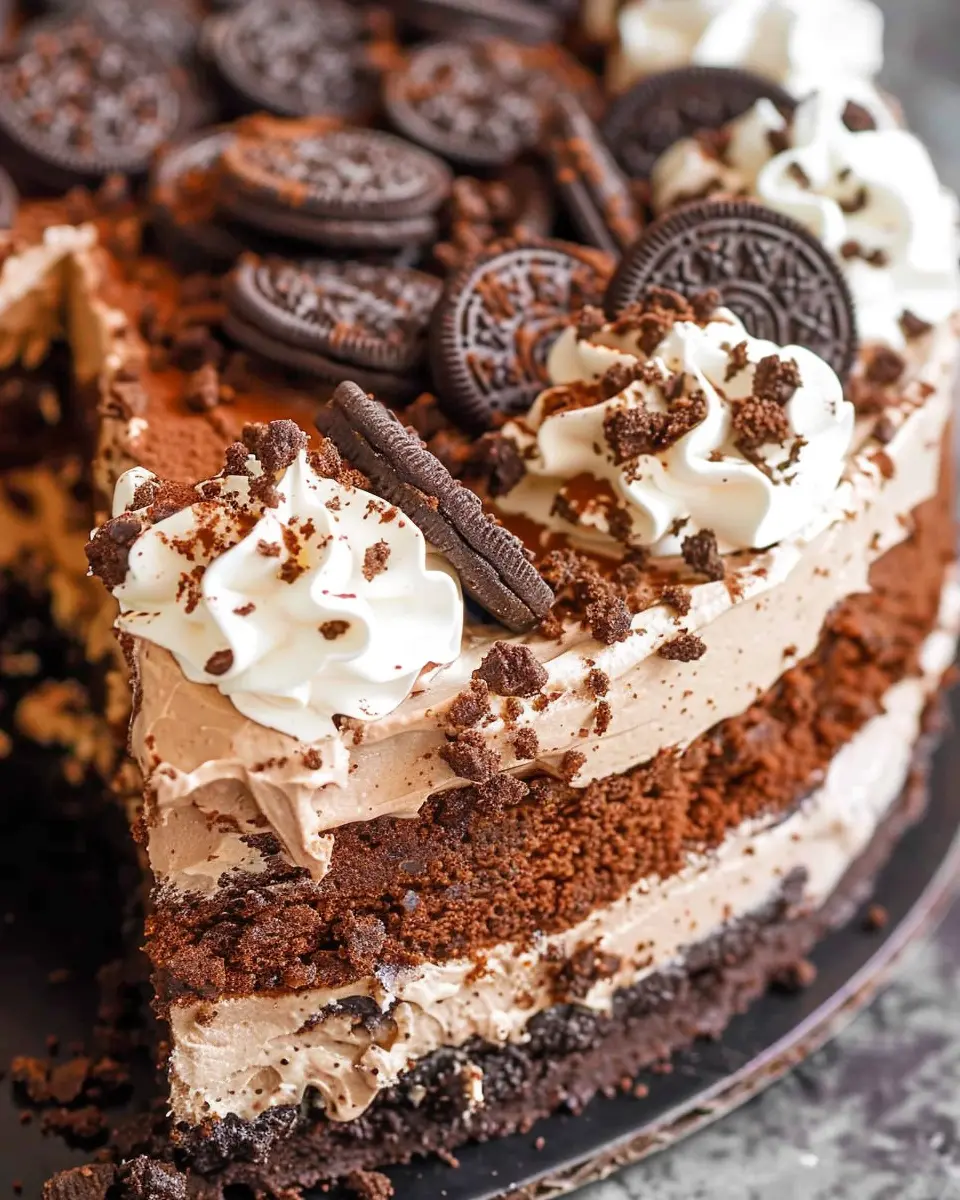
Imagine returning home after a long day and indulging in a slice of this heavenly creation. The layers of rich chocolate and creamy mousse provide a delightful escape, proving that you truly deserve a moment of joy. The Oreo Mousse Cake practically makes itself, requiring minimal baking skills and prep time. It’s the sort of dessert that can be prepared in advance, letting you chill in the fridge until you and your friends are ready to enjoy it.
Here’s why this cake stands out:
-
Quick and Easy Preparation: With just a handful of ingredients and no complicated techniques, you’ll have a luxurious dessert ready to impress, whether it’s for a spontaneous gathering or a relaxing evening.
-
Versatile Flavors: You can customize the Oreo Mousse Cake to suit various palates. Want a stronger chocolate flavor? Throw in some cocoa powder or even a drizzle of chocolate sauce. Prefer a bit of tanginess? A hint of orange zest adds a surprisingly delightful contrast.
-
Impressive Yet Accessible: Often, desserts that look gourmet can be intimidating. But this cake strikes the perfect balance, allowing you to serve something fancy without being stressed out about the preparation.
As you consider desserts that fit seamlessly into your busy lifestyle, think of the ease of this Oreo Mousse Cake. It’s a delightful fusion of taste and textures that can easily turn any ordinary weeknight into a special occasion. So grab those Oreos, and get ready to create a dessert that you’ll want to share with everyone—because what’s better than a slice of happiness shared with friends? For more inspiration, check out sources like The Kitchn to see how you can elevate your dessert game even further.
Ingredients for Oreo Mousse Cake
Key ingredients for a delightful Oreo Mousse Cake
To create a mouthwatering Oreo Mousse Cake, you’ll need a few essential ingredients that come together to form a rich and creamy dessert. Here’s what you’ll gather:
- Oreo Cookies: These are the star of the show! You’ll need both whole cookies for the crust and crumbled ones for the mousse.
- Cream Cheese: Use softened cream cheese for that luscious, creamy texture that holds the mousse together.
- Heavy Whipping Cream: This will help create airy, fluffy mousse. Whipping it to soft peaks is key!
- Powdered Sugar: A touch of sweetness goes a long way in balancing the flavors.
- Gelatin: This ensures your mousse sets perfectly without being too firm.
Optional ingredients to enhance the flavor
Want to take your Oreo Mousse Cake to the next level? Consider these optional ingredients:
- Vanilla Extract: A splash of this can deepen the overall flavor profile.
- Chocolate Chips: Fold in mini chocolate chips for an extra chocolatey bite.
- Whipped Topping: Top your mousse with a dollop of whipped cream for visual appeal and creaminess.
By mixing and matching these ingredients, you can create a unique dessert that will impress your friends and family. For additional tips on baking, check out Serious Eats or Food Network. Happy baking!
Step-by-step preparation of Oreo Mousse Cake
Creating an Oreo Mousse Cake is a delightful way to indulge your sweet tooth while impressing friends and family with minimal effort. This layer of decadence is beautiful, creamy, and fun to make! Let’s get started with the process by breaking it down step-by-step.
Gather and prepare your ingredients
Before diving into the baking process, it’s essential to gather all the necessary ingredients. This method will not only streamline your workflow but also set you up for success. Here’s what you’ll need:
-
For the crust:
-
24 Oreo cookies (plain, not double-stuffed)
-
4 tablespoons of melted butter
-
For the mousse filling:
-
2 cups of heavy cream (cold)
-
1 cup of powdered sugar
-
1 teaspoon vanilla extract
-
8 oz cream cheese (softened)
-
10 crushed Oreo cookies (for mixing into the mousse)
-
For decoration:
-
Extra Oreo cookies for garnish
-
Chocolate shavings or whipped cream, if desired
Having all these ingredients ready will save you time and make the process much smoother. You can find high-quality ingredients at your local grocery store or order them online for convenience.
Crush the Oreos and prepare the crust
Now let’s move on to the crust, which will serve as the foundation of your Oreo Mousse Cake. The crushed Oreos combined with melted butter create a rich, sweet, and crunchy base. Follow these simple steps:
-
Crush the Oreos: Place the 24 Oreo cookies in a zip-top bag and crush them using a rolling pin until they resemble fine crumbs—or use a food processor for an easier option.
-
Combine with melted butter: In a bowl, mix the crushed Oreos with the melted butter until it reaches a wet sand consistency.
-
Shape the crust: Press the mixture firmly into the bottom of a 9-inch springform pan. It’s essential to pack it down well to prevent crumbling later.
-
Chill the crust: Place the crust in the fridge for about 15-20 minutes while you prepare the mousse.
Make the rich mousse filling
Now for the pièce de résistance—the mousse filling. This is where your Oreo Mousse Cake truly shines, offering a fluffy texture and rich chocolatey flavor. Here’s how to whip up this delicious filling:
-
Whip the cream: In a large bowl, beat the heavy cream with a mixer on medium speed until soft peaks form. Gradually add in the powdered sugar and vanilla extract, mixing until combined and peaks remain stiff.
-
Cream the cheese: In another bowl, beat the softened cream cheese until smooth and creamy. This part ensures that there are no lumps in your filling.
-
Combine: Gently fold the whipped cream into the cream cheese mixture until well incorporated.
-
Add crushed Oreos: Finally, fold in the 10 crushed Oreo cookies, being careful not to deflate the mousse.
Assemble the cake layers
With your crust and mousse ready, it’s time to bring your cake together. This is the fun part where everything starts to take shape!
-
Layer the mousse over the crust: Pour about half of the mousse mixture over the chilled crust and spread it evenly.
-
Add more mousse: Pour the remaining mousse on top, smoothing the surface with a spatula.
-
Optional layer: If you want to get fancy, you can add an additional layer of whole or crushed Oreos in-between mousse layers—why not make it even more indulgent?
Chill and set the cake
The final step requires some patience but yields a perfectly set Oreo Mousse Cake. Cover the cake with plastic wrap and refrigerate for at least 4-6 hours or, for the best results, overnight. This time allows the mousse to firm up beautifully.
When ready to serve, release the sides of the springform pan and garnish with extra Oreo cookies and chocolate shavings if desired. Slice, serve, and enjoy the praises you’ll surely receive for creating this delightful dessert!
By following these steps, you’re not just making an Oreo Mousse Cake; you’re crafting a memorable experience that conjures joy and sweetness in every bite. The blend of flavors and textures in this cake will leave your guests asking for seconds—and the recipe!
Variations on Oreo Mousse Cake
When it comes to your beloved Oreo Mousse Cake, the possibilities for variation are endless! Whether you want to play around with different cookie flavors or incorporate other sweet elements, these suggestions will surely inspire your next baking adventure.
Cookie and Cream Variations
Why limit yourself to traditional Oreos? Try these fun cookie alternatives:
- Peanut Butter Oreos: Give your mousse cake a nutty twist by swapping regular Oreos for Peanut Butter Oreos. This adds a rich, creamy layer that pairs beautifully with the mousse.
- Mint Oreos: Infuse a touch of freshness by using Mint Oreos instead! The cool mint flavor elevates your cake to a new aromatic level, perfect for summer gatherings.
- Golden Oreos: For a lighter flavor profile, opt for Golden Oreos. Their vanilla flavor creates a subtle, sweet base that complements the chocolate mousse beautifully.
These unique cookie choices not only enhance the flavor but also introduce new textures to the cake, making every slice a delightful surprise.
Layered Variations with Other Flavors
If you’re looking to experiment with multiple flavors in your Oreo Mousse Cake, here are some enticing ideas:
- Chocolate and Raspberry: Add a layer of raspberry puree between the mousse and cookie crust. The tartness of the raspberries fuses wonderfully with the chocolate, creating a flavor explosion.
- Caramel Swirl: Drizzle caramel sauce over the mousse layer for an indulgent treat. It brings a hint of sweetness and pairs exceptionally well with the chocolate and cookies.
- Matcha Green Tea: For a unique twist, incorporate matcha powder into part of the mousse. Its earthy flavor adds a sophisticated touch to the dessert.
Whether you’re baking for a special occasion or just looking to satisfy your sweet tooth, don’t hesitate to get creative! If you’re eager to explore more variations, consider checking out this article on flavor pairings for additional inspiration. Happy baking!
Cooking Tips and Notes for Oreo Mousse Cake
Tips for Achieving the Perfect Mousse Texture
To create a luxurious and airy Oreo Mousse Cake, it’s essential to incorporate air into the mousse. Start by whipping your cream to soft peaks before folding it into the chocolate mix. Be gentle; you want to maintain that lightness! Also, ensure your chocolate has cooled to room temperature before combining, as hot chocolate can deflate your mousse.
Common Pitfalls to Avoid While Making the Cake
- Overmixing: It’s tempting to keep mixing while folding, but this can lead to a dense mousse. Aim for just combined.
- Using Warm Ingredients: Ensure your cream and chocolate are at the right temperatures. Warm elements can cause separation.
- Misjudging Chilling Times: Let the mousse set in the refrigerator for adequate time—usually at least 4 hours. Rushing this step can lead to a runny texture.
These handy tips should steer you away from any Oreo Mousse Cake mishaps and help you impress your friends and family! For an extra layer of flavor, consider adding a thin layer of melted dark chocolate on top before serving. Happy baking!
Serving suggestions for Oreo Mousse Cake
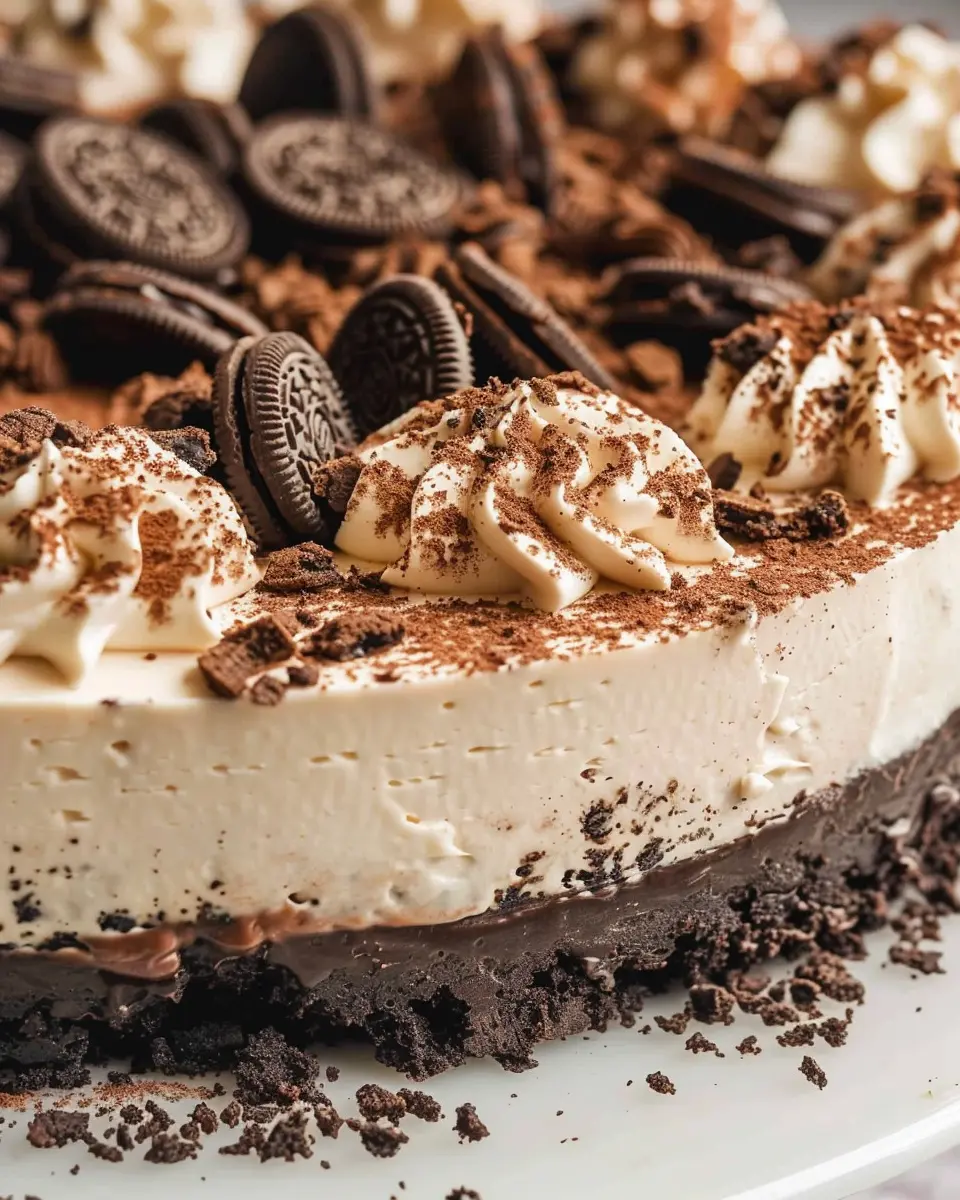
Creative ways to serve and present the cake
Elevate your Oreo Mousse Cake presentation with a few simple tricks. Consider slicing the cake into individual portions, garnishing each slice with a dollop of whipped cream, and showering them with crushed Oreo cookies for that extra flair. For a stunning centerpiece, serve the cake on a decorative cake stand surrounded by fresh berries or chocolate shavings. Drizzle some chocolate sauce around the plate for a touch of elegance that’s sure to impress your guests.
Pairing suggestions for a well-rounded dessert experience
For a complete dessert experience that delights the senses, think about pairing your Oreo Mousse Cake with complementary flavors. A scoop of vanilla or cookies and cream ice cream provides a wonderful contrast to the mousse’s creamy texture. Alternatively, consider serving it alongside a rich coffee or herbal tea, which cuts through the sweetness beautifully. If you’re looking for a non-alcoholic drink option, a refreshing mint lemonade can cleanse the palate and enhance the chocolatey goodness of the cake.
For more insights on dessert pairings, check out this helpful resource. Enjoy the rich flavors and textures!
Time breakdown for Oreo Mousse Cake
Preparing an indulgent Oreo Mousse Cake sounds a bit daunting, but it’s truly a delightful experience! Here’s how to break down your time for a smooth baking session.
Preparation time
You’ll need about 30 minutes for the Oreo Mousse Cake prep. This part includes gathering your ingredients, crushing those Oreos, and mixing them with cream, cocoa, and more.
Chilling time
Next, let your creation chill for a minimum of 4 hours. This step is crucial, as it allows the mousse to set properly and develop that rich flavor.
Total time
In total, expect to spend around 4.5 hours, including prep and chilling. Adding that personal touch will make it all worthwhile!
For more baking tips, check out resources like The Kitchn or Serious Eats. Happy baking!
Nutritional Facts for Oreo Mousse Cake
When whipping up an Oreo Mousse Cake, it’s essential to be aware of its nutritional profile to enjoy it guilt-free. Here’s a quick breakdown:
Calories per Slice
Each slice of this decadent dessert typically packs around 300 calories. This can vary based on portion size and specific ingredient choices, so feel free to adjust your serving to fit your dietary needs.
Sugar Content
With a delightful creaminess from the mousse and the iconic crunch from Oreos, this cake contains approximately 25 grams of sugar per slice. While this might seem high, it’s the sweetness that makes each bite irresistibly satisfying.
Dietary Considerations
If you’re concerned about dietary restrictions, consider this: Oreo Mousse Cake isn’t gluten-free, but it can be adapted for various diets. Using vegan cream cheese or coconut whipped cream can make it dairy-free, and swapping out the regular Oreos for gluten-free versions will accommodate those with gluten sensitivities.
For more detailed nutritional insights, check out the USDA’s nutrition database. Balancing indulgences like this cake with an overall healthy lifestyle makes for a joyful experience in any kitchen!
FAQ about Oreo Mousse Cake
Can I make Oreo Mousse Cake ahead of time?
Absolutely! One of the best things about Oreo Mousse Cake is that it can be prepared in advance. In fact, making it the day before you plan to serve it often enhances the flavors as they have time to meld together. Just be sure to refrigerate it properly in an airtight container to maintain its creamy texture and keep it fresh.
What’s the best way to store leftovers?
If you happen to have any leftovers (which can be rare with this delightful dessert!), storing them correctly is key to preserving their deliciousness.
- Refrigerate: Keep your Oreo Mousse Cake in an airtight container in the fridge. It should stay good for about 3 to 5 days.
- Freeze: If you want to extend its shelf life, you can freeze portions of the cake. Just wrap individual slices tightly in plastic wrap and place them in a freezer-safe container. Thaw in the refrigerator overnight before enjoying.
Can I substitute the Oreos with other cookies?
You bet! While Oreos give this cake its signature flavor, you can experiment with other cookies if you prefer. Try using chocolate wafer cookies, Peanut Butter Creme cookies, or even gluten-free alternatives for a different twist. Just remember, the taste will vary, but that’s part of the fun! For some inspiration, check out this article on cookie substitutions from Serious Eats.
Cooking should be an adventure, so don’t hesitate to make this recipe your own. Whether you’re prepping for a gathering or simply indulging yourself, the Oreo Mousse Cake is sure to impress!
Conclusion on Oreo Mousse Cake
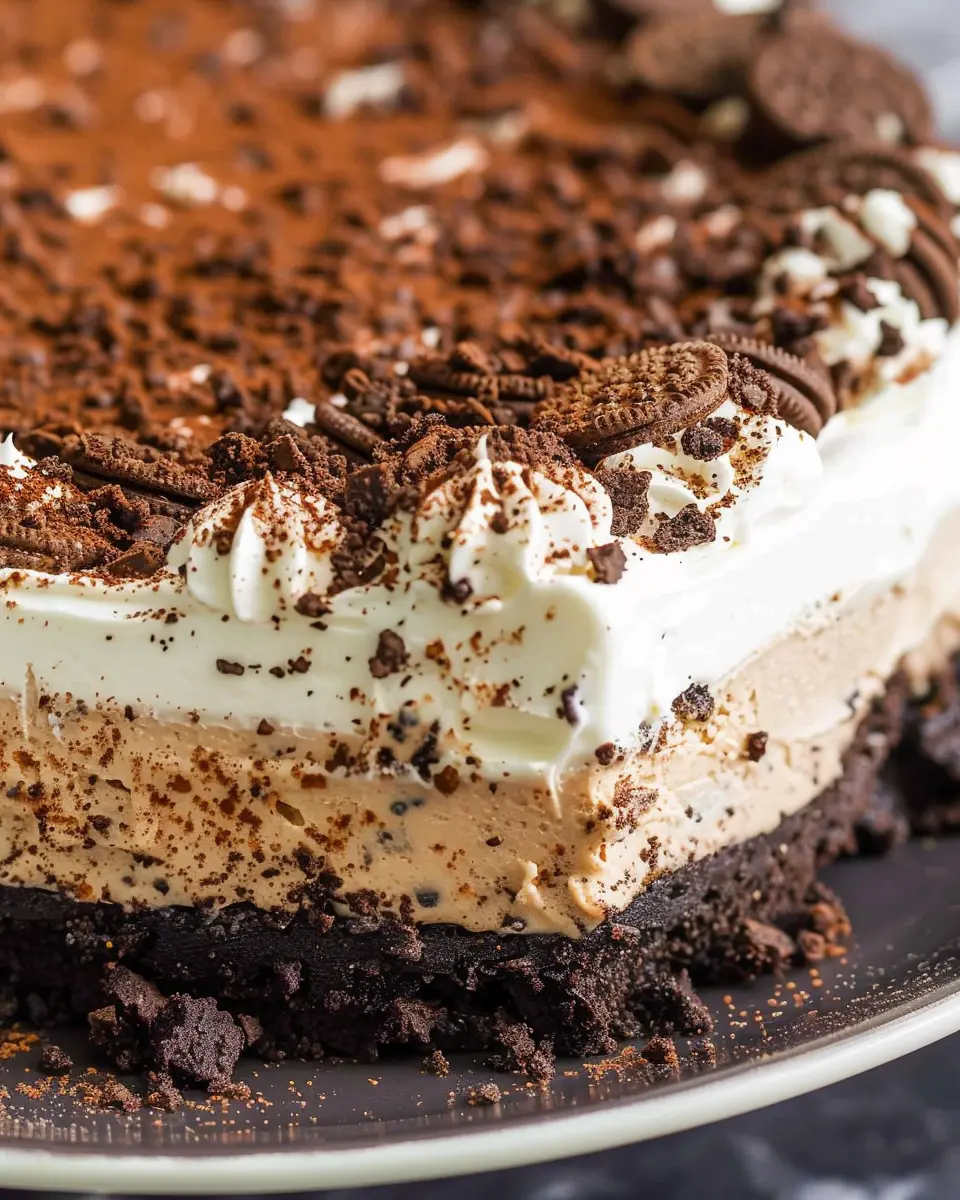
Why Making Oreo Mousse Cake at Home Is Worth the Effort
Creating an Oreo Mousse Cake from scratch is not just about indulging in a delicious dessert; it’s an experience that can elevate your culinary skills and impress your friends. The layers of creamy mousse and the crunch of Oreos are a delightful combination that store-bought cakes simply can’t replicate.
By making this cake at home, you control the ingredients, ensuring freshness and quality. Plus, there’s something truly satisfying about crafting your own dessert masterpiece. If you’re looking to create unforgettable memories and impress loved ones, this treat is a fantastic choice. So don’t hesitate—exciting flavors await!
For more dessert ideas and recipes, check out Baker’s Journal and Taste of Home.
PrintOreo Mousse Cake: Indulgent Dessert Recipe for Every Occasion

Delight in the rich and creamy texture of this Oreo Mousse Cake, perfect for any celebration or as a special treat.
- Prep Time: 30 minutes
- Cook Time: 10 minutes
- Total Time: 4 hours 40 minutes
- Yield: 8 servings 1x
- Category: Desserts
- Method: bake, chill
- Cuisine: American
- Diet: vegetarian
Ingredients
- 3 cups crushed Oreo cookies
- 1/2 cup unsalted butter, melted
- 2 cups heavy cream
- 1 cup powdered sugar
- 16 oz cream cheese, softened
- 1 cup chocolate ganache
- 1 cup additional crushed Oreos for topping
Instructions
- Preheat your oven to 350°F (175°C).
- In a mixing bowl, combine crushed Oreo cookies and melted butter; press mixture into the bottom of a springform pan to form the crust.
- Bake for 10 minutes, then let it cool.
- In another bowl, beat cream cheese and powdered sugar until smooth.
- In a separate bowl, whip the heavy cream until stiff peaks form.
- Fold the whipped cream into the cream cheese mixture until fully incorporated.
- Spread half of the mousse over the crust, then layer with chocolate ganache.
- Add the remaining mousse and top with crushed Oreos.
- Refrigerate for at least 4 hours before serving.
Notes
- Allow the cake to chill overnight for the best flavor.
- Use gluten-free Oreos for a gluten-free version.
Nutrition
- Serving Size: 1 slice
- Calories: 450
- Sugar: 39g
- Sodium: 220mg
- Fat: 30g
- Saturated Fat: 18g
- Unsaturated Fat: 10g
- Trans Fat: 0g
- Carbohydrates: 40g
- Fiber: 2g
- Protein: 6g
- Cholesterol: 80mg
Keywords: Oreo Mousse Cake, dessert, cake, indulgent dessert