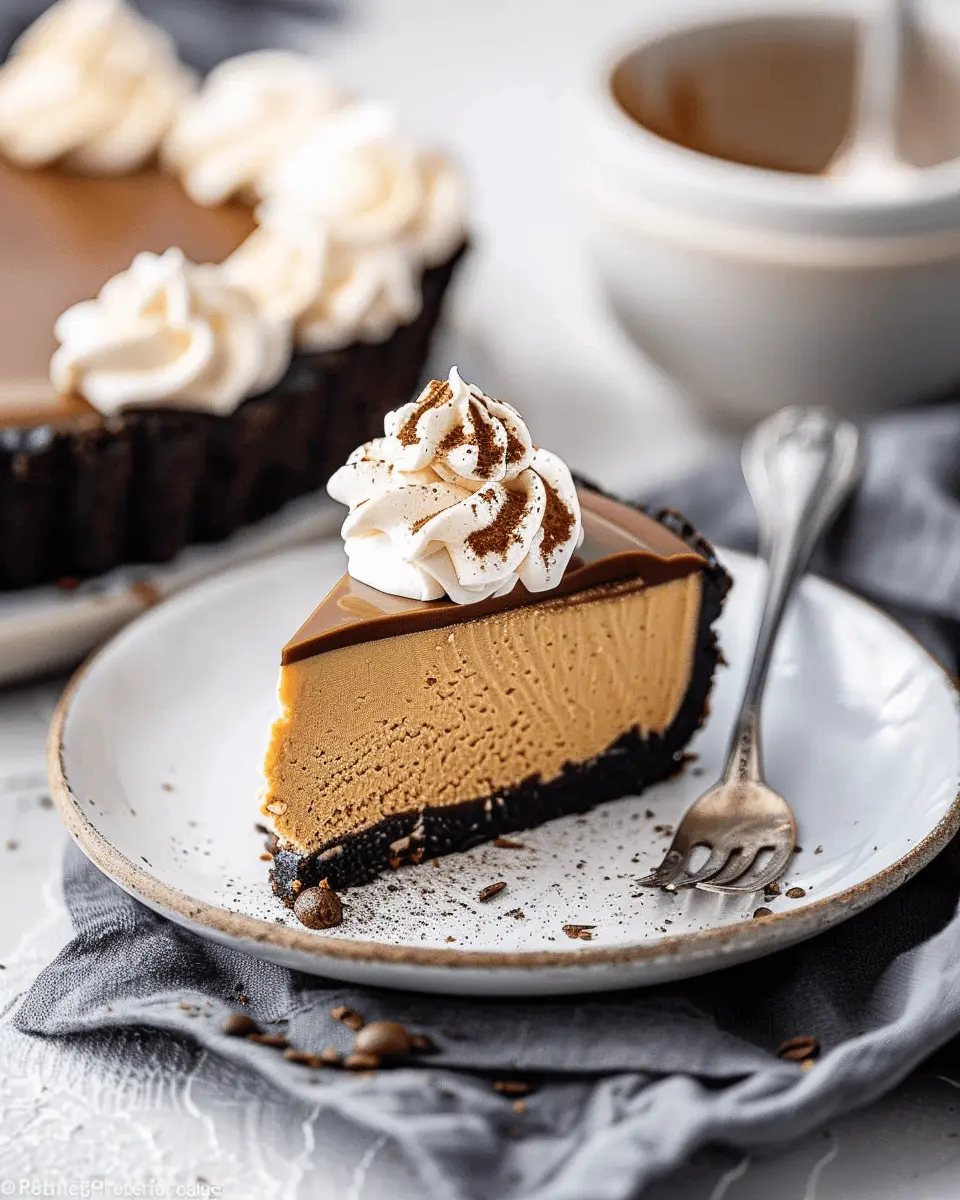
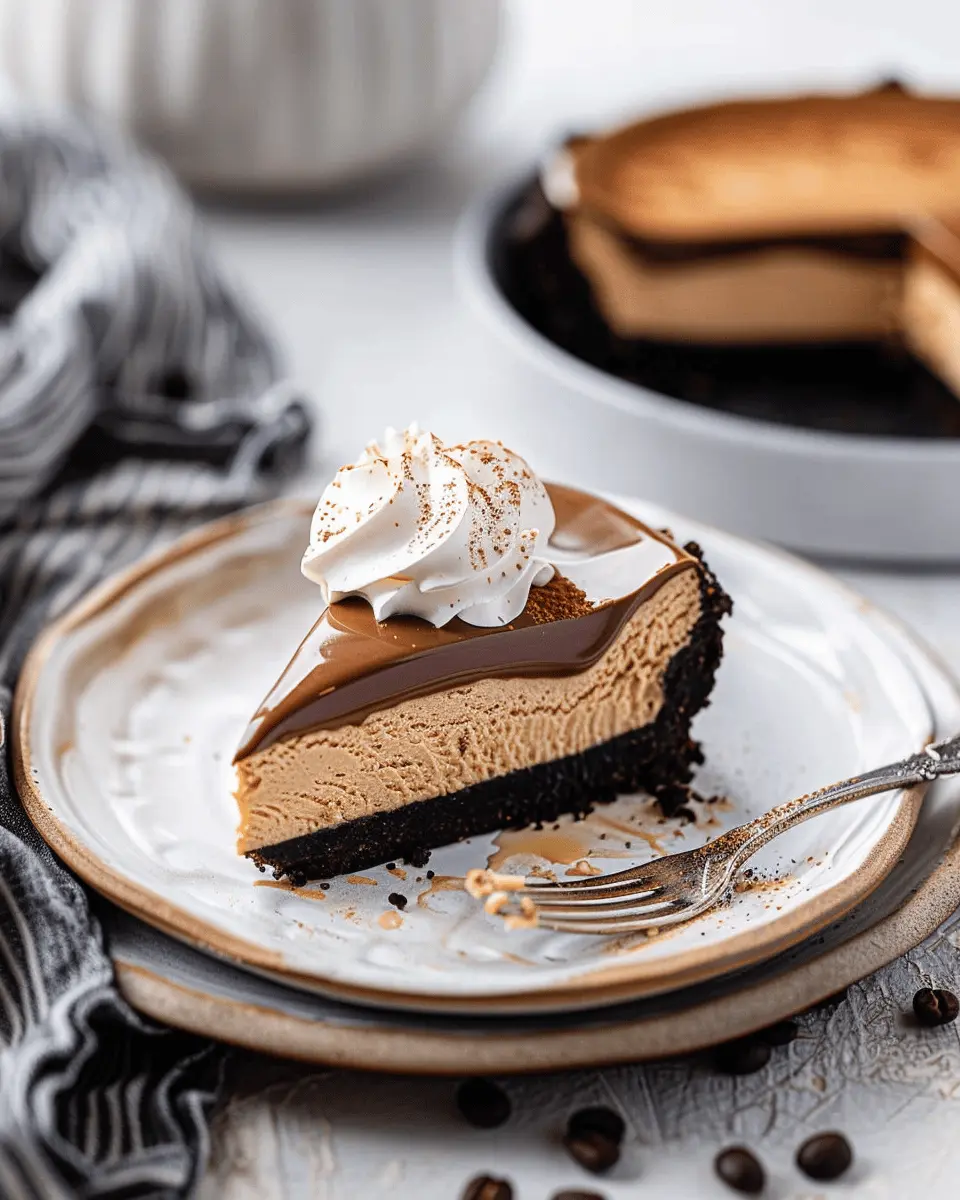
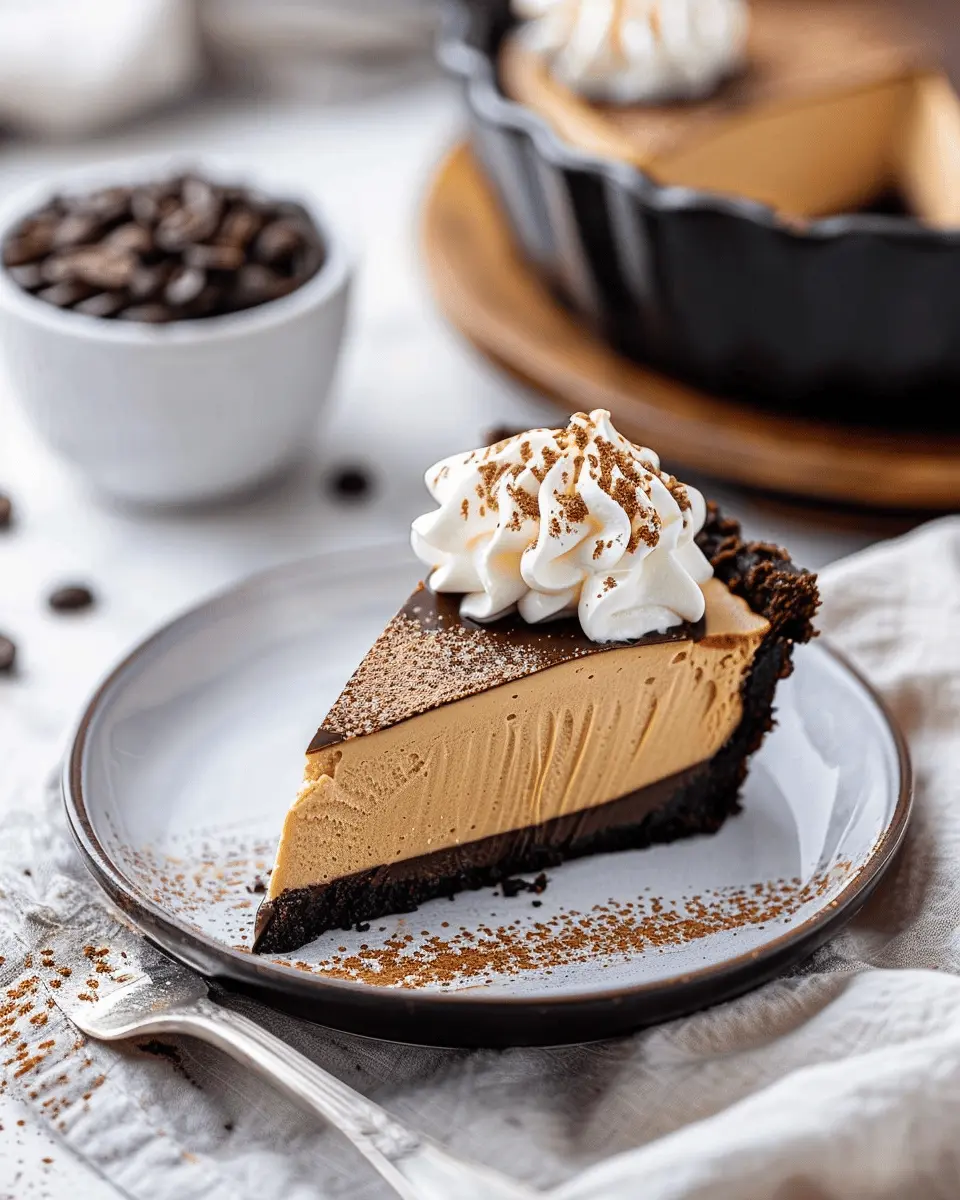
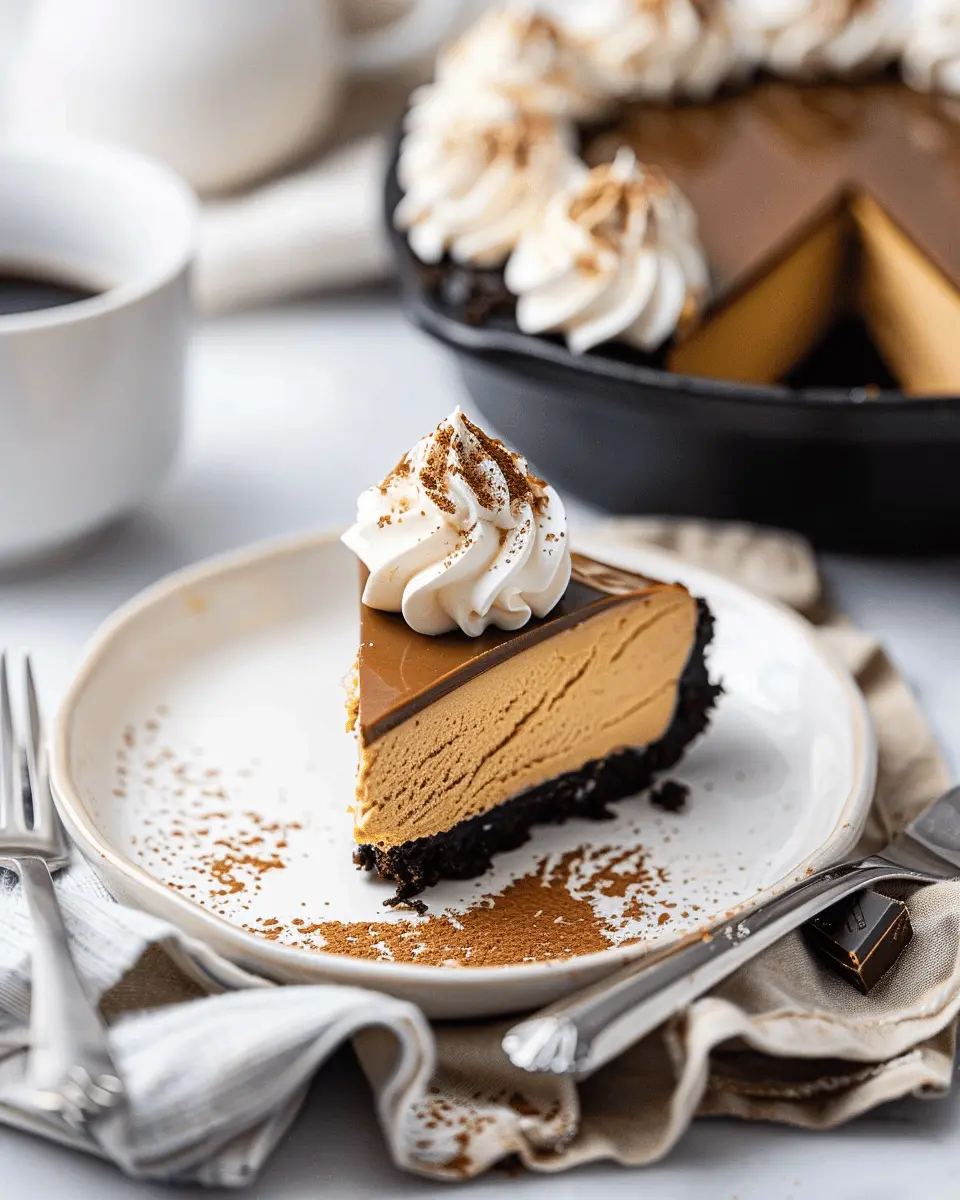
Introduction to Silky Coffee Cheesecake
If you’re looking for a dessert that combines the rich flavors of coffee with a creamy texture, silky coffee cheesecake should be on your radar. Imagine sinking your fork into a piece of this luscious treat—each bite is a symphony of smooth, velvety cream and the deep, aromatic essence of coffee. It’s not just a cheesecake; it’s an experience that elevates your dessert game.
What Makes Silky Coffee Cheesecake Irresistible?
There’s something magical about the combination of coffee and cheesecake. Here’s why this enticing dessert hits all the right notes:
-
Texture: The term “silky” isn’t just for show. This cheesecake achieves an incredibly soft and smooth exterior thanks to the careful blend of cream cheese and whipped cream. Add a layer of chocolate ganache on top, and you have a glossy finish that’s visually appealing and delicious.
-
Flavor Balance: The bittersweet notes from the coffee perfectly complement the sweetness of the cream cheese. Whether you’re using freshly brewed coffee or high-quality espresso, the depth of flavor adds a sophisticated touch that can impress any guest.
-
Versatility: This dessert isn’t just for special occasions; it fits right in at brunch, dinner parties, or even a cozy night in. It pairs wonderfully with your favorite coffee drinks (think cappuccinos or lattes) or a refreshing glass of iced tea.
-
Simplified Yet Elegant: Many impressive desserts take hours of preparation, but with a silky coffee cheesecake, you can create something that looks artisanal but is surprisingly simple to make. Even if you’re juggling a busy schedule, this recipe can fit seamlessly into your day.
For those who love coffee in any form, whether it’s a morning brew or an afternoon pick-me-up, this cheesecake truly embodies that passion. Ready to dazzle your taste buds? Hang tight! We’re about to dive into the delightful process of crafting your very own silky coffee cheesecake with chocolate ganache.
For more tips on perfecting your cheesecakes, check out this guide from the American Culinary Federation for expert insights!
Ingredients for Silky Coffee Cheesecake
Creating a delectable silky coffee cheesecake isn’t just an art; it starts with the right ingredients. Let’s break it down into three key sections, ensuring you have everything you need for a perfect treat.
Essential ingredients for the cheesecake base
To craft a delightful cheesecake, you’ll want a buttery, crumbly base. The main players include:
- Graham cracker crumbs: They provide that classic cheesecake crunch.
- Unsalted butter: Melted, for binding everything together.
- Sugar: A touch of sweetness to balance the flavors.
Ingredients for the coffee layer
The heart of your silky coffee cheesecake is the rich coffee layer. Gather these items:
- Cream cheese: The creamy foundation that makes cheesecakes so irresistible.
- Confectioners’ sugar: For a smooth texture.
- Espresso or strong brewed coffee: This adds that rich coffee flavor—choose a quality roast for the best results.
- Sour cream or Greek yogurt: For a hint of tanginess.
Toppings and garnishes to elevate your cheesecake
Don’t forget about the finishing touches! Enhance your cheesecake with:
- Chocolate ganache: Decadent and glossy, it’s a must-try topping.
- Whipped cream: Light and airy to contrast the dense cheesecake.
- Coffee beans or chocolate shavings: For a touch of elegance and extra flavor.
With these ingredients in hand, you’re on your way to serving up a silky coffee cheesecake that will impress friends and family alike. Happy baking! For tips on perfecting your cheesecake, check this guide.
Preparing Silky Coffee Cheesecake
Creating a rich and delicious silky coffee cheesecake at home might seem a bit daunting, but with the right preparation, it can become an enjoyable and rewarding experience. Whether you’re gearing up for a special occasion or just want to treat yourself to something sweet, let’s break down each step to make your cheesecake dreams come true!
Gather and measure ingredients
Before you dive into the fun part, start by gathering all your ingredients. This not only simplifies the cooking process but also ensures that you don’t miss anything crucial. Here’s what you’ll need for this decadent cheesecake:
-
For the crust:
-
1 1/2 cups of graham cracker crumbs
-
1/4 cup of sugar
-
1/2 cup of unsalted butter, melted
-
For the filling:
-
4 (8-ounce) packages of cream cheese, softened
-
1 cup of granulated sugar
-
1 teaspoon of vanilla extract
-
4 large eggs
-
1 cup of sour cream
-
For the coffee flavor:
-
1/2 cup of freshly brewed espresso (or strong coffee)
-
1 tablespoon of coffee liqueur (optional)
Don’t forget to have your springform pan ready as well. And hey, if you’re curious about the differences in crust types, check out this guide on cheesecake crusts for inspiration!
Create the crust
Now that you’ve gathered your ingredients, let’s make that delicious crust to hold all that creamy filling together.
- Preheat your oven to 325°F (160°C).
- In a mixing bowl, combine the graham cracker crumbs and sugar.
- Pour in the melted butter and mix until it resembles wet sand.
- Press this mixture firmly into the bottom of your springform pan to create an even layer.
- Bake for about 10 minutes until it’s lightly golden, then let it cool completely.
Creating your crust is where you can get creative! Want a bit of a twist? Try adding some cinnamon or cocoa powder to the graham cracker crumbs for extra flavor.
Prepare the cheesecake filling
With your crust cooling, it’s time to whip up that rich cheesecake filling.
- In a large mixing bowl, beat the softened cream cheese on medium speed until smooth and creamy.
- Gradually add in the granulated sugar, mixing until well combined.
- Blend in the vanilla extract, followed by one egg at a time, ensuring each egg is fully incorporated before adding the next.
Patience is key here; over-mixing can cause cracks in your cheesecake.
Blend in the coffee flavor
The moment you’ve been waiting for: adding that fabulous coffee flavor!
- Slowly mix in the freshly brewed espresso or strong coffee, allowing it to blend seamlessly with the cream cheese mixture.
- If you’re using coffee liqueur for an extra kick, this is the time to incorporate it.
The aroma of the coffee should be enticing, filling your kitchen with a warm, inviting scent. It’s a little dose of heaven right at your fingertips.
Bake and chill the cheesecake
Now it’s time to bake! This part transforms your silky coffee cheesecake from a batter into a luscious dessert.
- Pour the cheesecake mixture over the cooled crust in your springform pan.
- Bake for 55–60 minutes, or until the edges are set but the center still has a slight jiggle.
- After baking, let the cheesecake cool in the oven with the door ajar for about an hour to prevent cracking.
Finally, refrigerate your cheesecake for at least 4 hours; overnight is even better! This chilling period allows the flavors to meld beautifully.
When it’s time to serve, consider topping it with a rich chocolate ganache for the perfect finishing touch. Enjoy your homemade silky coffee cheesecake and marvel at the joy it brings to your friends and family! For more dessert inspiration, check out this collection of dessert recipes and keep exploring the joy of baking.
Variations on Silky Coffee Cheesecake
The world of cheesecakes is diverse and delicious, so why stop at the classic silky coffee cheesecake? Here are a couple of enticing variations to satisfy your taste buds and impress your friends.
Mocha Chocolate Swirl Cheesecake
Imagine a rich, decadent cheesecake infused with deep coffee flavor and swirls of luscious chocolate. To create a mocha chocolate swirl cheesecake, mix in melted dark chocolate with your cheesecake batter and follow your traditional recipe. As you pour the batter into the springform pan, take a toothpick and create lazy swirls of chocolate through the top. This not only adds a striking visual element but infuses each bite with a delightful mix of coffee and chocolate harmonies. You can even top it off with a dusting of cocoa powder for that extra flair.
For the perfect pairing with this mocha spin, consider a rich, creamy cappuccino to complement the dessert’s flavors. Interested in more creative ideas? Check out this food blog for delicious coffee-inspired recipes.
Nutty Caramel Coffee Cheesecake
Craving a twist that’s both crunchy and sweet? Try the nutty caramel coffee cheesecake. This version incorporates finely chopped nuts—like pecans or walnuts—into your crust for a satisfying crunch. Drizzle a luscious caramel sauce atop the cheesecake after baking and chilling it. This not only enhances its alluring texture but also brings a sweet element that beautifully balances the bitterness of the coffee. You might even want to sprinkle some sea salt over the caramel to love the extra flavor it brings!
Experimenting with these variations can lead to an even more personalized cheesecake journey. Whichever you choose, the joy of creating your own silky coffee cheesecake is truly satisfying!
Baking notes for Silky Coffee Cheesecake
Common pitfalls and how to avoid them
Creating a silky coffee cheesecake can feel daunting, but avoiding common pitfalls will elevate your dessert game. One crucial mistake is overmixing the batter, which can lead to a dense texture. When combining your ingredients, mix until just combined. Also, make sure your cream cheese is at room temperature; otherwise, you’ll end up with lumps. Lastly, keep an eye on baking time — every oven is different, so don’t hesitate to use a toothpick test to check for doneness.
Storage tips for maintaining creaminess
To keep your silky coffee cheesecake decadent and creamy, storing it correctly is essential. Always refrigerate your cheesecake, covering it with plastic wrap to prevent it from absorbing odors. For optimal creaminess, allow it to sit at room temperature for about 30 minutes before serving. And if you plan to enjoy it later, consider freezing individual slices; just wrap them tightly and place them in an airtight container. For tips on cheesecake freezing, check out this expert guide.
Serving suggestions for Silky Coffee Cheesecake
Pairing beverages to complement flavors
When it comes to enjoying your silky coffee cheesecake, thoughtful beverage pairings can elevate the overall experience. Consider serving it with a rich, full-bodied coffee like a dark roast or an espresso. The bitter notes of the coffee beautifully balance the sweetness of the cheesecake. For a non-coffee option, try a creamy chai latte or a refreshing cold brew tea with hints of vanilla.
Curious about specialty coffee techniques? Check out Blue Bottle Coffee for tips on brewing the perfect cup.
Creative presentation ideas for gatherings
Want to impress guests at your next gathering? Here are some fun ideas to present your silky coffee cheesecake:
- Individual servings: Scoop portions into small cups or jars for a charming dessert display.
- Garnish with flair: Top each slice with chocolate shavings or a sprinkle of cocoa powder to add texture and visual appeal.
- Serve alongside: Arrange slices on a platter with fresh berries or a dollop of whipped cream for contrast.
These small details can transform your cheesecake from delightful to dazzling! Guests will appreciate not just the taste but also the effort you put into presentation.
Feeling inspired? Exploring different styles can take your dessert game to the next level. Embrace creativity and watch as your silky coffee cheesecake becomes the talk of the table!
Time details for Silky Coffee Cheesecake
Preparation time
Getting started on your silky coffee cheesecake is a breeze! You’ll need about 20 minutes to gather your ingredients and whip up the cheesecake batter.
Baking time
Next, let the oven do its magic! The baking phase for your cheesecake will take around 40–45 minutes. Patience is key here!
Chilling time
After baking, the hardest part lies ahead: waiting. Chill your cheesecake in the fridge for at least 4 hours, or preferably overnight, so it sets beautifully.
Total time
In total, you’re looking at around 5 hours and 5 minutes, including prep, bake, and chill time. But trust me, each moment is worth it for that deliciously silky slice you’ll serve.
For more insights on cheesecake techniques, check out this cheesecake guide that dives deeper into perfecting your texture!
Nutritional Information for Silky Coffee Cheesecake
When you indulge in a slice of Silky Coffee Cheesecake with Chocolate Ganache, it helps to know what you’re savoring! Here’s a quick breakdown of its nutritional content:
Calories
A single slice of this decadent cheesecake packs approximately 350 calories. While indulgent, it’s perfect for that occasional treat without derailing your healthy eating goals.
Protein
This silky creation offers about 6 grams of protein per serving, thanks to the cream cheese and eggs, giving you a good balance between indulgence and nutrition.
Sodium
With around 200 mg of sodium per slice, this dessert is relatively moderate, making it a delightful option for enhancing your dessert repertoire while keeping an eye on your sodium intake. For more in-depth information about sodium guidelines, check out resources from The American Heart Association.
By treating yourself to this silky coffee cheesecake, you’re not just enjoying a dessert—you’re also getting a quick boost of energy from that delightful coffee kick! What’s not to love?
FAQs about Silky Coffee Cheesecake
Can I make this cheesecake without coffee?
Absolutely! If you’re not a coffee lover or simply want to experiment, you can replace coffee with other flavors. Options like vanilla extract or even espresso-flavored alternatives can maintain that rich base. Just keep in mind that the cheesecake may lose that signature silky coffee cheesecake vibe, but it will still be delicious!
How do I know when my cheesecake is done?
This is a great question! A perfectly baked cheesecake should be set around the edges but slightly jiggly in the center. The ultimate test? Gently shake the pan; the middle should wobble like jelly, not overly liquidy. An internal temperature of around 150°F (65°C) is often a good indicator as well. Remember, it will keep cooking as it cools, so it’s better to underbake slightly!
What’s the best way to cut and serve cheesecake?
Serving a cheesecake can often feel daunting, but it’s pretty straightforward! Here are some quick tips:
- Chill Completely: Make sure your cheesecake is fully chilled for at least four hours – overnight is even better.
- Use a Hot Knife: Dip your knife in hot water and wipe it clean- this helps achieve a smooth cut.
- Portion Control: Aim for slices about 1 inch wide to keep things neat.
For a beautiful presentation, consider adding a drizzle of chocolate ganache or a sprinkle of cocoa powder on top. Who wouldn’t love to dig into a slice of silky coffee cheesecake when it looks that good?
For more detailed cheesecake tips, check out resources like The Cheesecake Factory or Food Network for more ideas and inspiration!
Conclusion on Silky Coffee Cheesecake
Final thoughts on why you should try making silky coffee cheesecake at home
Making a silky coffee cheesecake at home isn’t just about enjoying a delicious dessert—it’s an experience that invites friends and family to gather around. The creamy texture combined with rich coffee flavor and a luscious chocolate ganache makes it a standout treat for any occasion. Plus, the process of crafting this cheesecake can be incredibly rewarding.
Imagine presenting a stunning dessert at your next gathering or relishing a slice while unwinding after a long day. For inspired baking tips, check out resources like Food Network for expert insights and variations. So, roll up your sleeves, channel your inner pastry chef, and treat yourself to this delightful creation—you won’t regret it!
PrintSilky Coffee Cheesecake: Indulgent Layer of Chocolate Ganache
Indulge in a rich and creamy silky coffee cheesecake topped with a luscious chocolate ganache. Perfect for coffee lovers!
- Prep Time: 30 minutes
- Cook Time: 1 hour
- Total Time: 5 hours 30 minutes
- Yield: 12 servings 1x
- Category: Dessert
- Method: Baking
- Cuisine: American
- Diet: Vegetarian
Ingredients
- 1 1/2 cups graham cracker crumbs
- 1/4 cup sugar
- 1/2 cup unsalted butter, melted
- 3 packages (8 ounces each) cream cheese, softened
- 1 cup sugar
- 1 teaspoon vanilla extract
- 3 large eggs
- 1/2 cup brewed coffee, cooled
- 1 cup heavy cream
- 8 ounces semisweet chocolate, chopped
Instructions
- Preheat the oven to 325°F (165°C).
- In a mixing bowl, combine graham cracker crumbs, sugar, and melted butter; press into the bottom of a springform pan.
- In a large bowl, beat cream cheese and sugar until smooth.
- Add vanilla extract, then mix in eggs one at a time.
- Stir in the cooled coffee until well combined.
- Pour the cream cheese mixture over the crust in the springform pan.
- Bake for 50-60 minutes, or until set. Allow to cool, then refrigerate for at least 4 hours.
- For the ganache, heat heavy cream in a saucepan until just simmering, then pour over chopped chocolate and let sit for 5 minutes before stirring until smooth.
- Pour ganache over the chilled cheesecake and spread evenly. Chill until set.
- Slice and serve garnished with coffee beans if desired.
Notes
- For added flavor, consider adding a tablespoon of espresso powder to the cheesecake mixture.
- Make sure to let the cheesecake cool completely before adding the ganache to avoid melting it.
Nutrition
- Serving Size: 1 slice
- Calories: 380
- Sugar: 22g
- Sodium: 210mg
- Fat: 28g
- Saturated Fat: 17g
- Unsaturated Fat: 8g
- Trans Fat: 0g
- Carbohydrates: 30g
- Fiber: 1g
- Protein: 6g
- Cholesterol: 90mg
Keywords: Silky Coffee Cheesecake, Chocolate Ganache, Dessert, Coffee Dessert